Prompting the Norway Story
How I built my travel scrapbook of my Norwegian road trip using Codex.
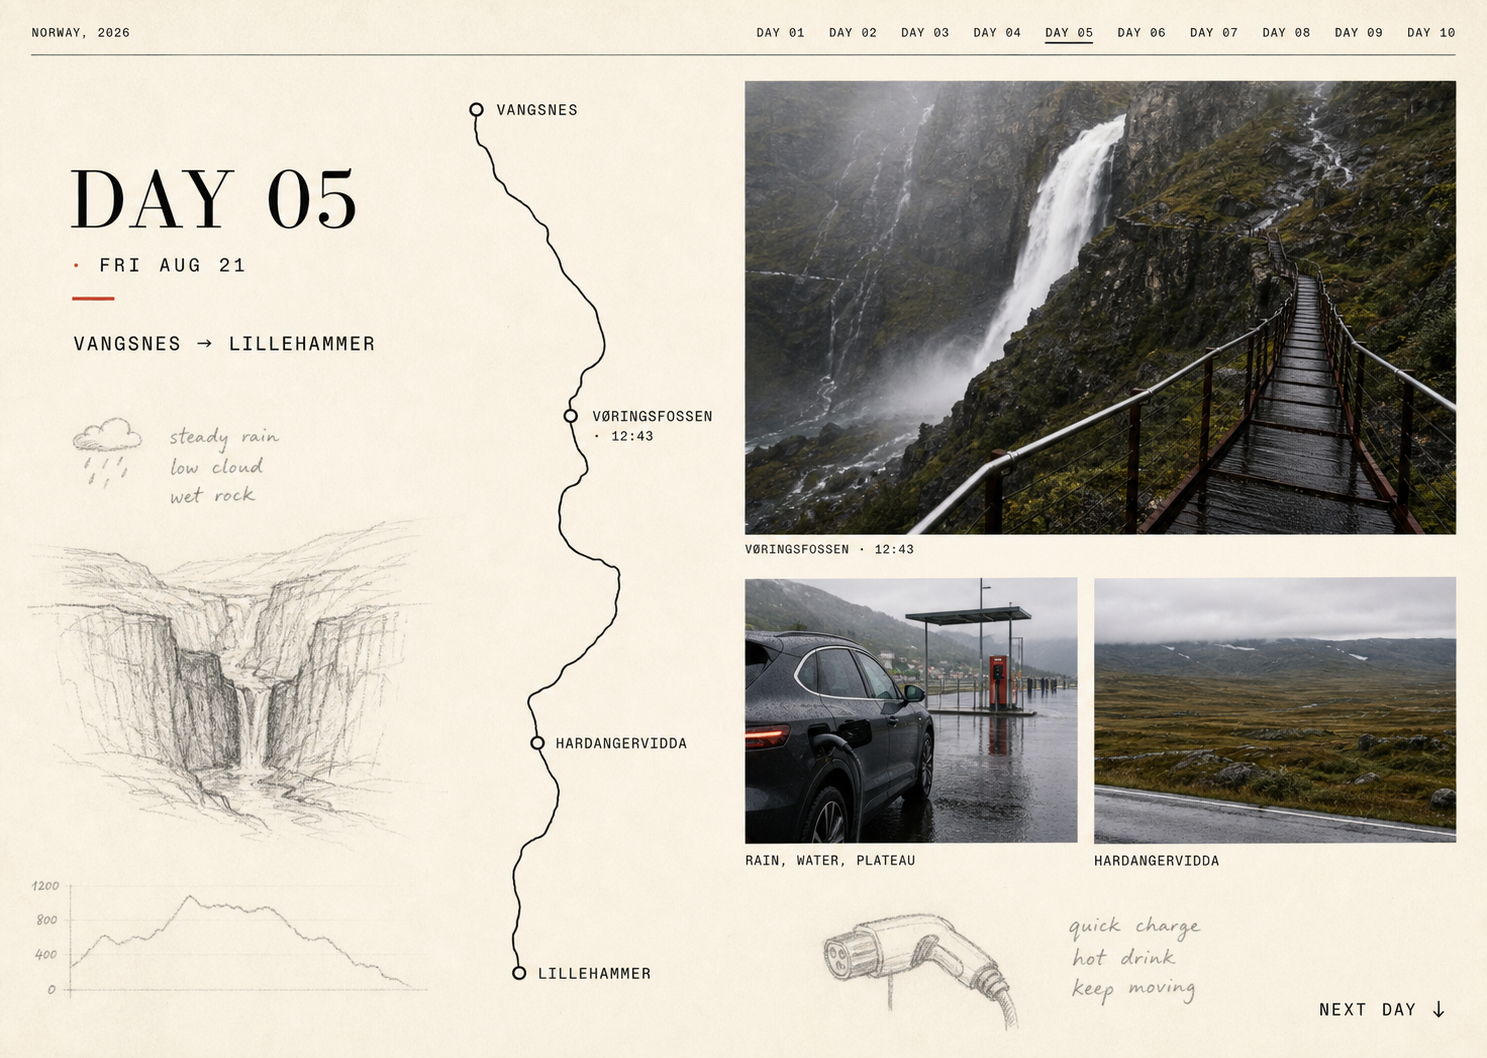
Before the scrapbook
After I got home from Norway, I started using ChatGPT to get my head around some of the family history we'd discussed on the trip. My mom and I had dedicated part of our time there to visiting relatives and learning more about our genealogy. I was making a few one-off pages about the families and the farms we'd visited.
At the same time, I was playing around with image prompts based on photographs I'd taken on the trip, trying them in different styles. Some paired photographs with pencil drawings. Others made the pictures fade into paper. From there, I got curious about building a little scrapbook from my photographs.
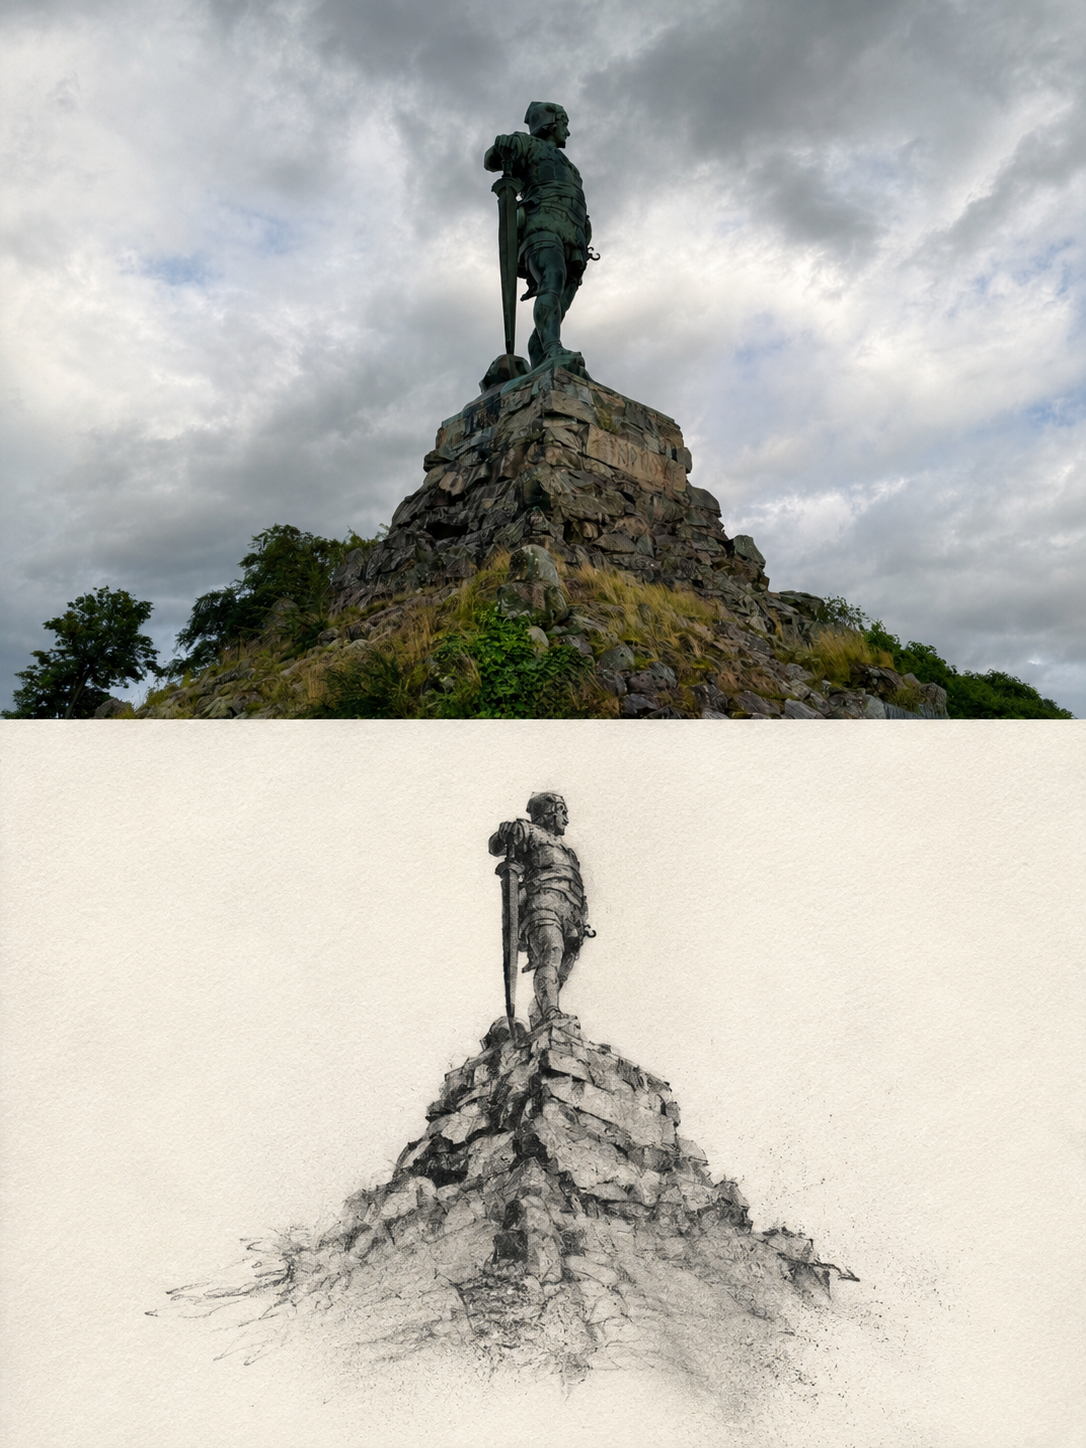
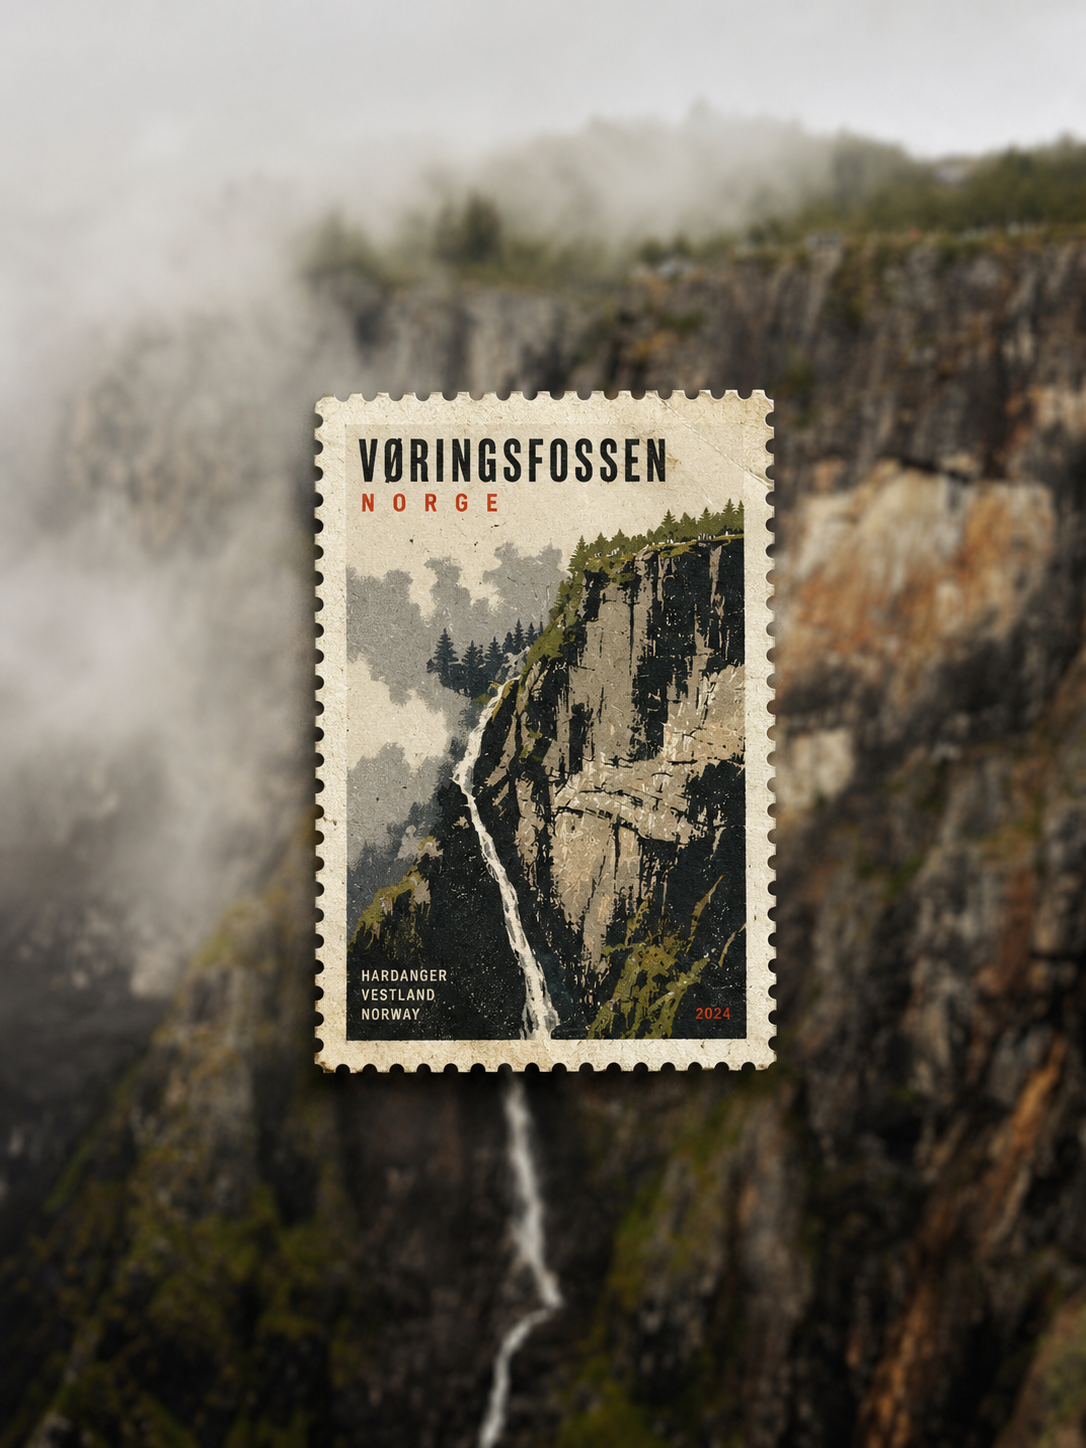
Testing out an idea
I already had quite a bit of information to start from. This was one of the first trips where I'd used ChatGPT more heavily to plan routes, partly around weather conditions and car charging locations. I'd kept making decisions in that same conversation along the way.
I asked ChatGPT to summarize where we'd actually gone, which gave me a day-by-day account of the trip. I brought that into Codex with my photographs and the details I remembered. I wanted the Norway story to follow the drive, with a path that moved through the places we'd visited and paused at the photographs.
I've included some of my prompts and Codex's replies on the left, alongside the parts of the story they relate to.
First, I started honing in on the design. Codex generated three concepts, and I chose the field journal shown at the top of this post. I liked the paper, the pencil drawings, and the red path through the photographs.
My approach was to generate concept art, choose a direction, and refine it before building the working version. Sometimes I wanted to combine parts of two concepts. I kept using that approach as I added more to the site.
We started with one day so I could see how it worked. Once I had something I could scroll through, I wanted to keep going and bring in the rest of the trip.
Feeding it data
I had a day-by-day summary of the trip, and we could fill in some of the gaps using the EXIF metadata from my photographs. The dates helped put the photographs in order, and the location information helped place some of our stops on the map.
I brought in my Hasselblad film photographs too, using what I remembered from the trip to work out where they fit. The finished album has 125 photographs.
I kept adding context about the people in the pictures, the farms we'd visited, and the family connections we'd talked about. I also had to go back through the earlier conversation and sort out which places we'd actually visited and which we'd only planned to see.
Once I had the photographs and the account of the trip together, I started wondering what else we could bring into the scrapbook. I began pushing Codex to find road data, drawings, and videos of the places we'd visited.
Searching for more data
The path was one of the first things I kept pushing. At Trollstigen, the switchback road, I liked the idea of following it up a sketched model of the mountain.
The selected mountain concept
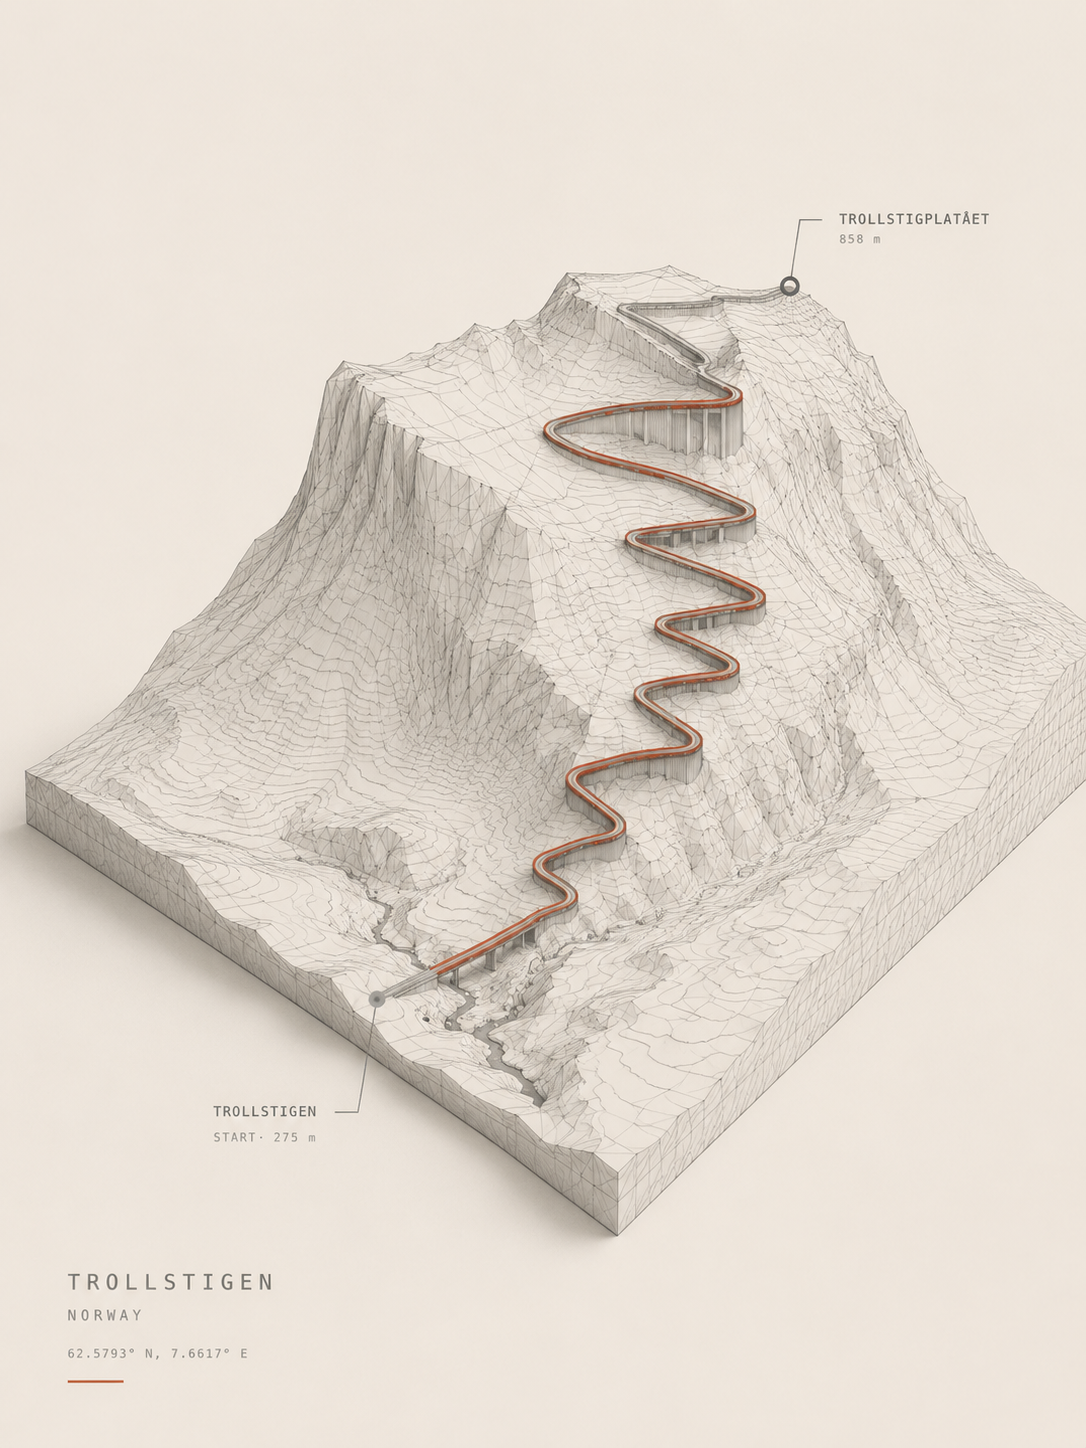
September 1. A generated Trollstigen concept. The terrain figures below use measured data. Image: GPT Image.
Initially, it was just a generic path. I started giving Codex map screenshots and asking it to get the actual road and location data. I wanted it to follow the bends we'd driven.
For Trollstigen, I pushed it to get real topographic data too. I wanted to keep the drawing style, but have the mountain and the road based on the actual place. I kept refining the concept and the working version from there.
The terrain and road data behind the drawing
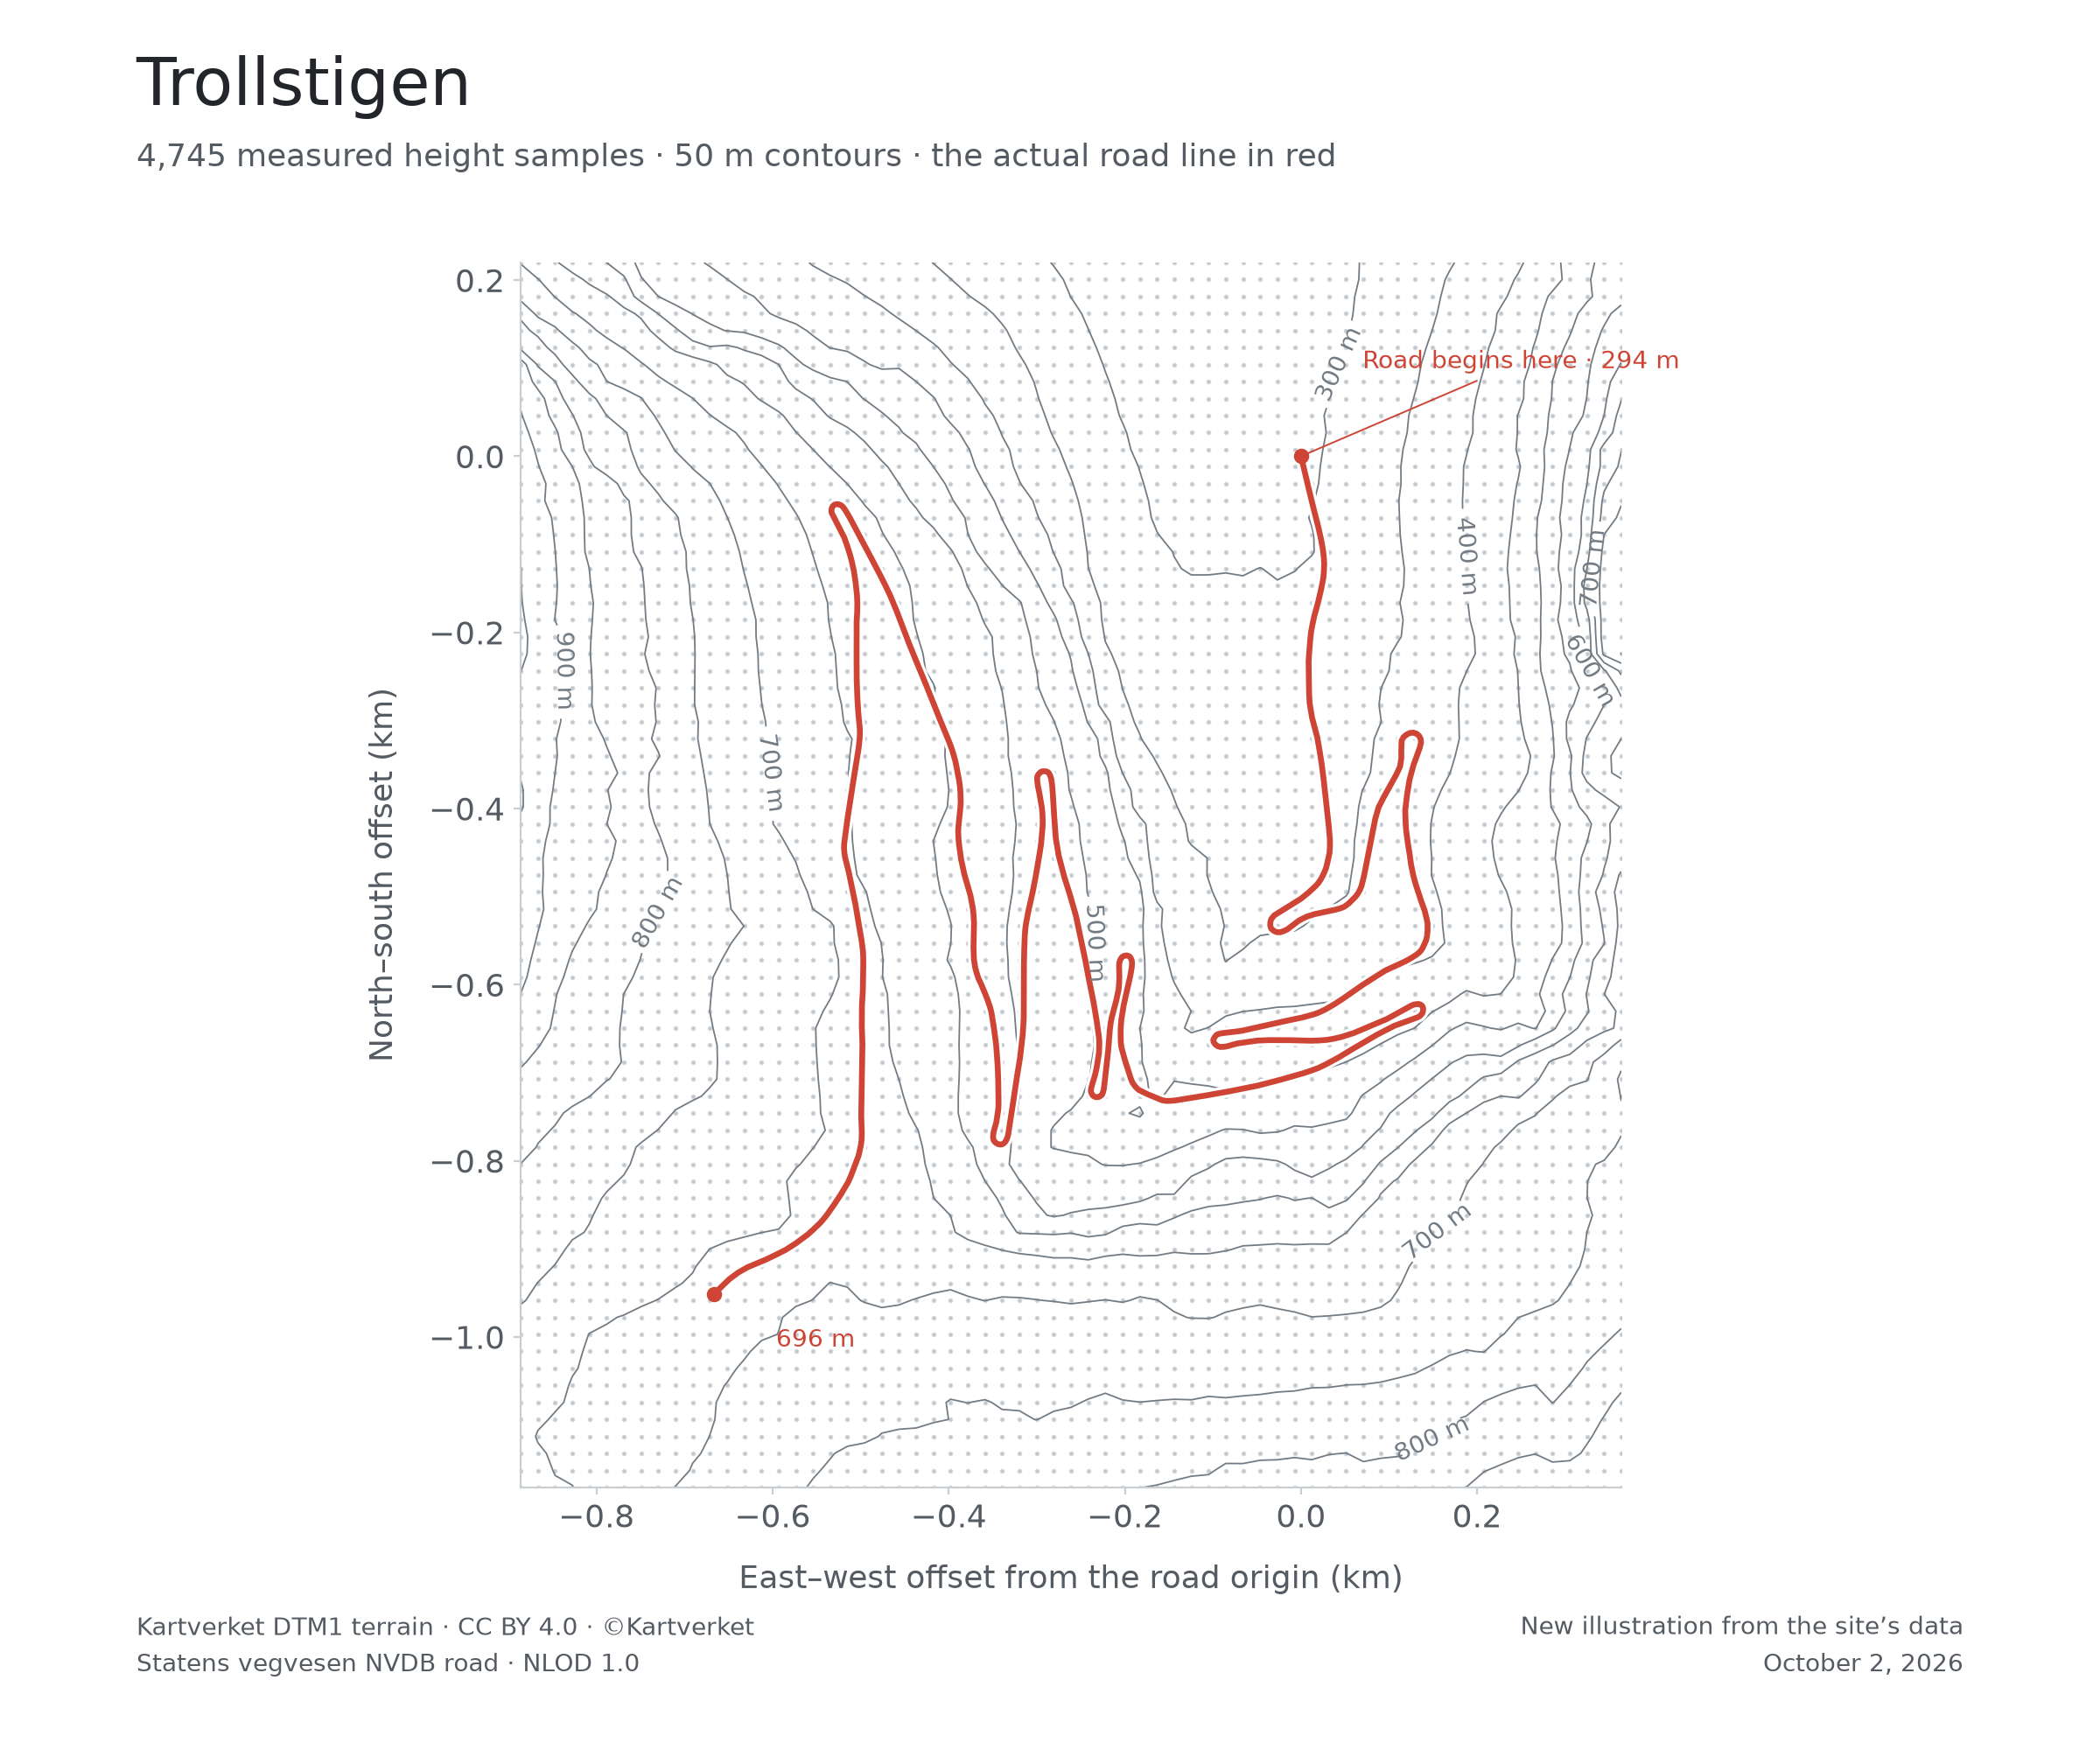
Trollstigen's switchbacks over the measured terrain. Terrain: ©Kartverket, CC BY 4.0. Road: Statens vegvesen, NLOD 1.0. 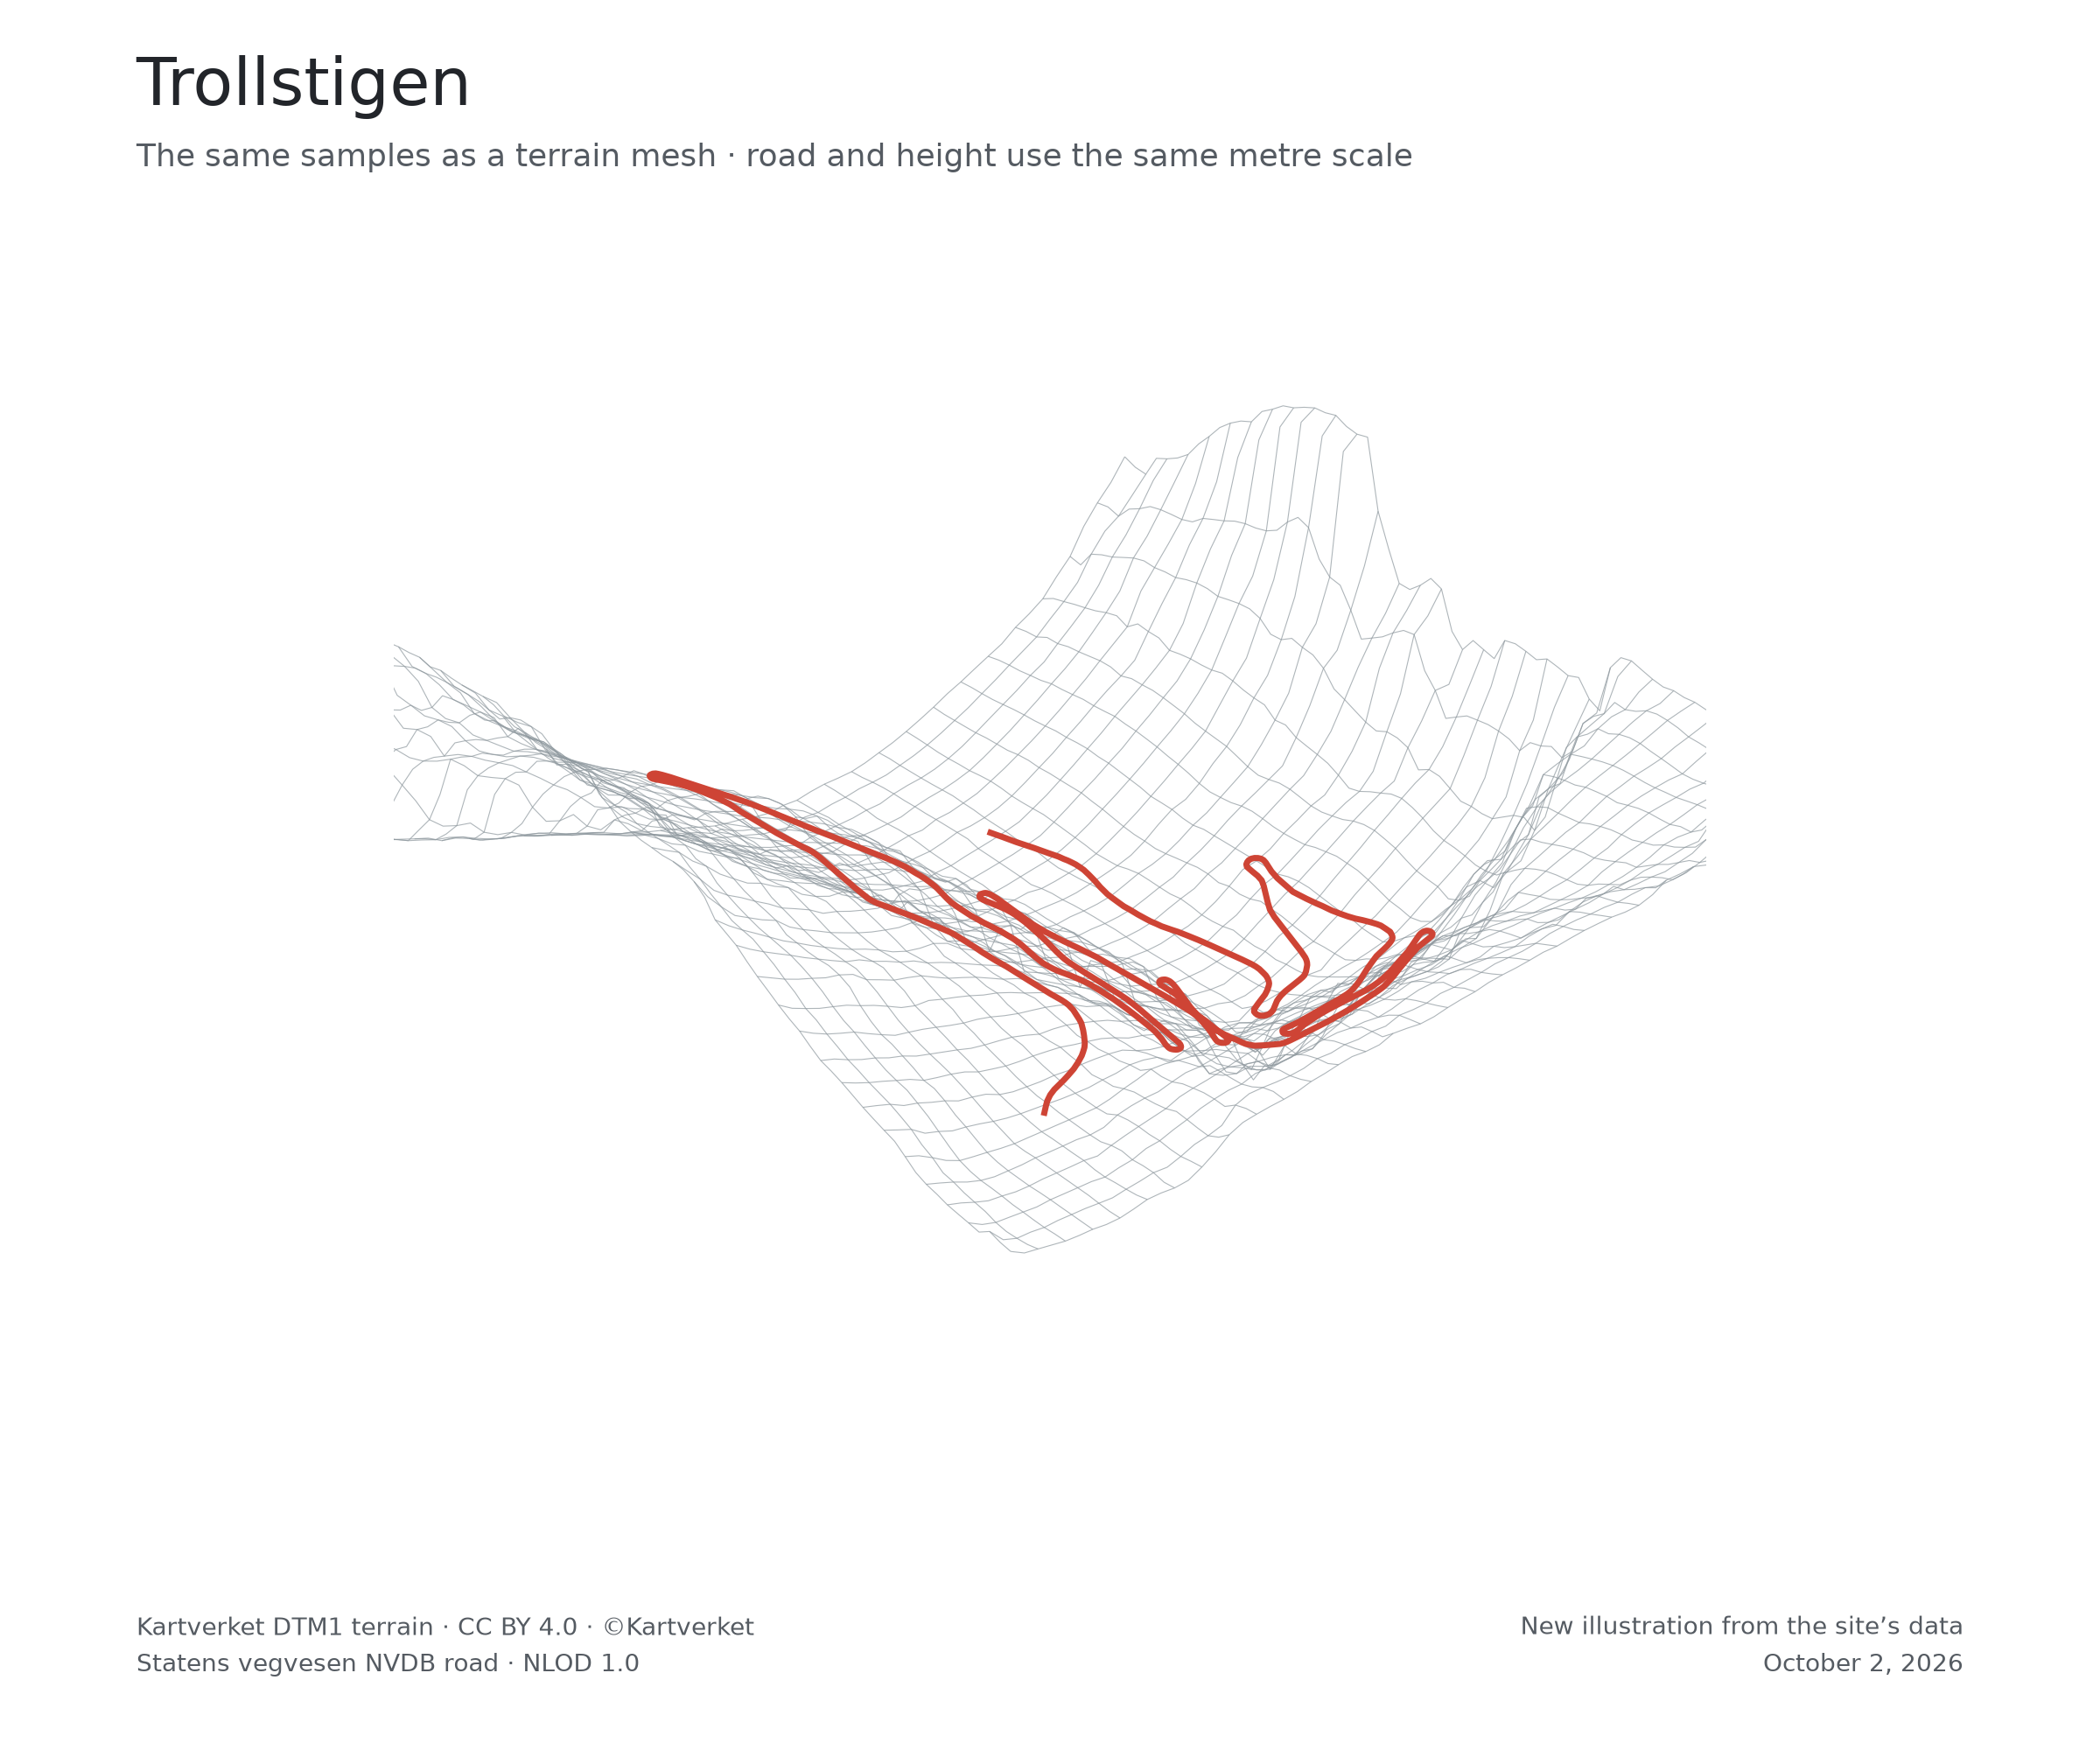
The same terrain in 3D, with the road in red.
Codex found the road line from Norway's road authority and elevation data from Kartverket, the national mapping agency. It used those to build the hillside and place the road on it.
Getting the bobsled track right
By the time I got to the part of the trip where I rode a wheelbob at the Lillehammer Olympic track at Hunderfossen, I wanted to try something more interactive. A wheelbob is a bobsled on wheels for the summer season.
I wanted to follow the course just behind the sled as I scrolled. I asked Codex to find the actual track data and started working through concepts. The first ones were too realistic, so I pushed it to keep our sketching style.
Selected concept studies
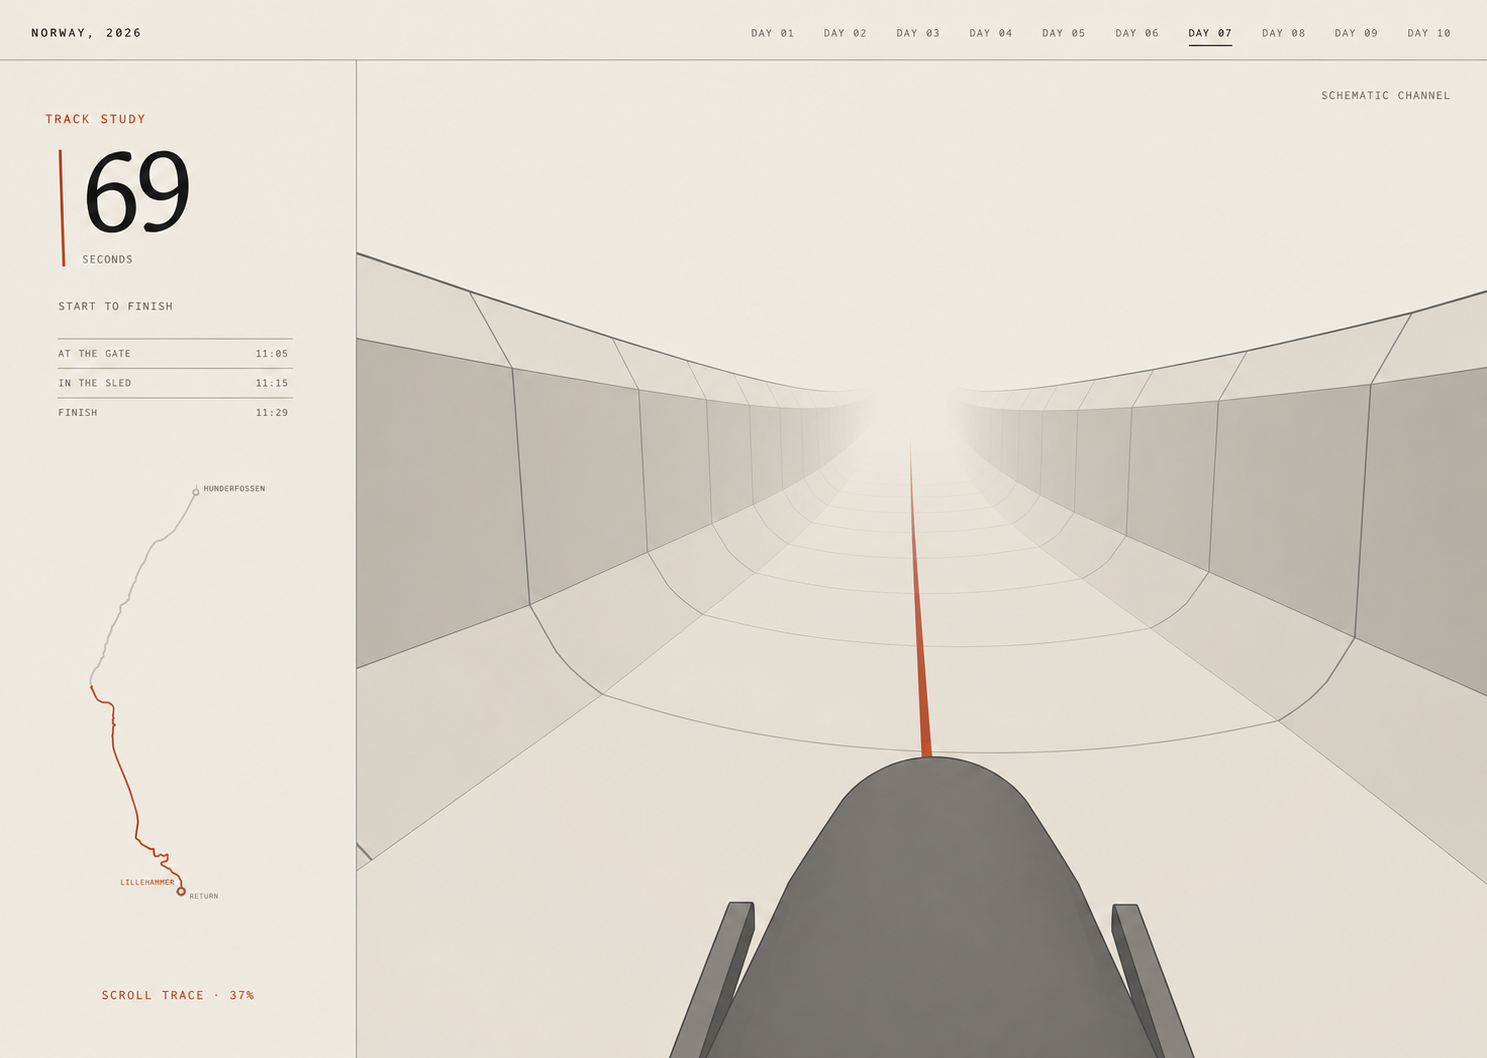
September 1. The simpler bobsled concept. Image: GPT Image, directed with GPT‑5.6 Sol. 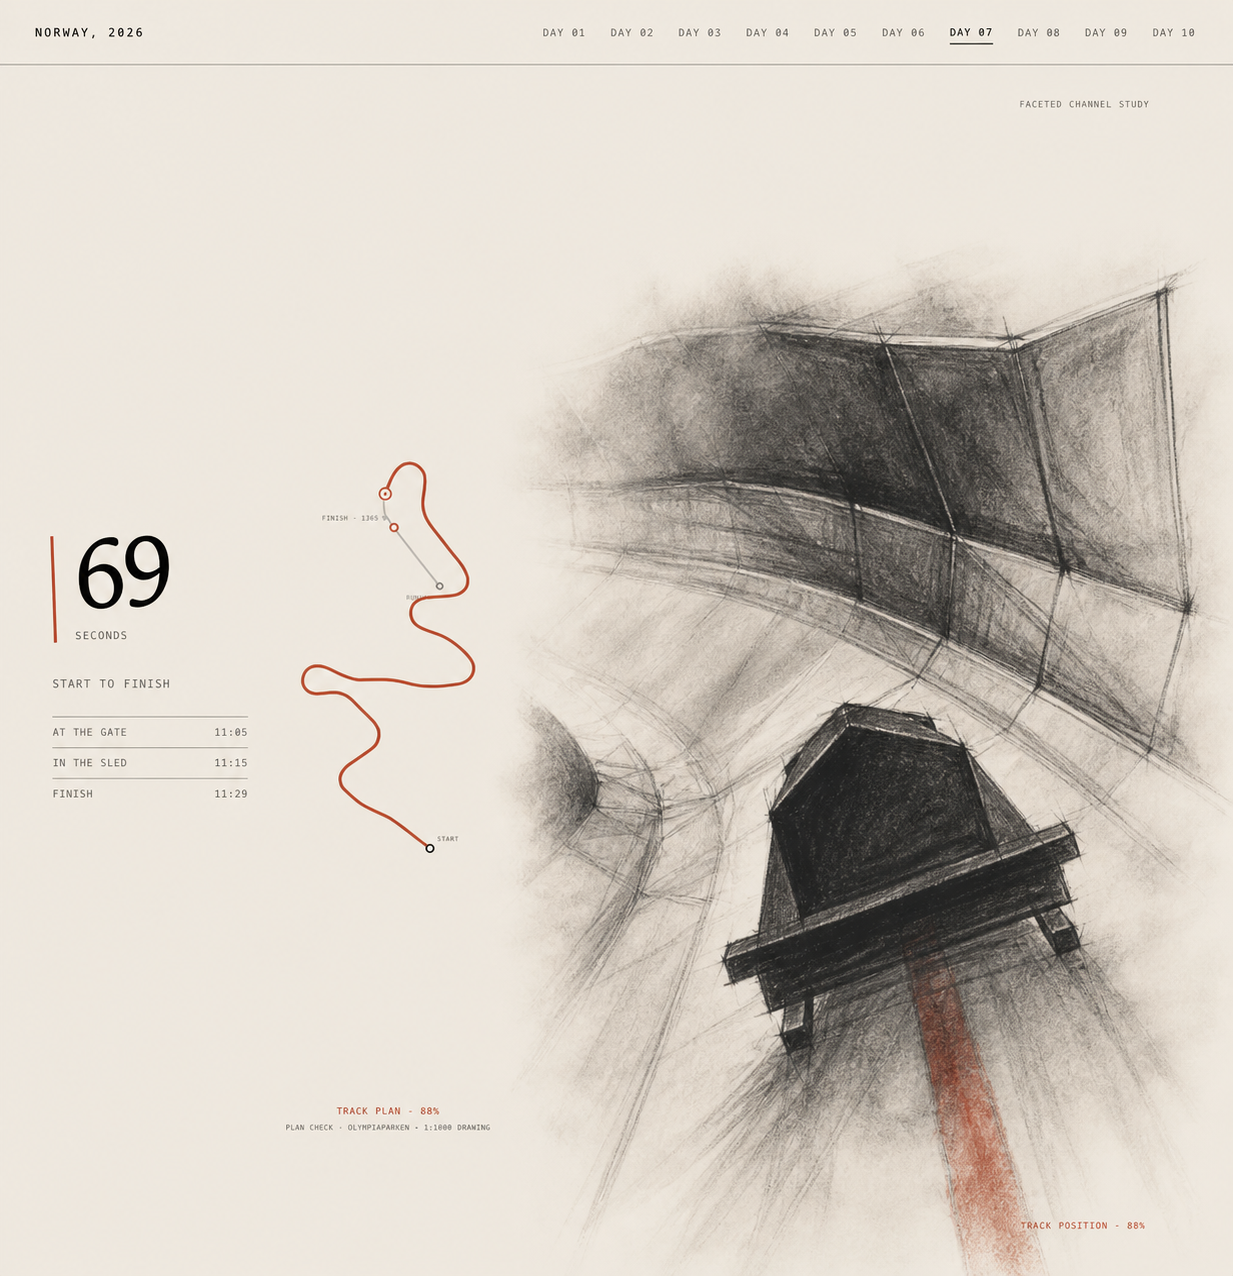
September 1. The charcoal direction I chose. Image: GPT Image, directed with GPT‑5.6 Sol.
I wanted to keep the drawing theme, so I chose the rougher charcoal direction. The first working model was pretty close, but some of the physics and track details seemed backwards. I gave Codex photographs of the sled and a YouTube video of the track. I asked it to run the model and video side by side, compare them frame by frame, and fix the curves and details that didn't look right.
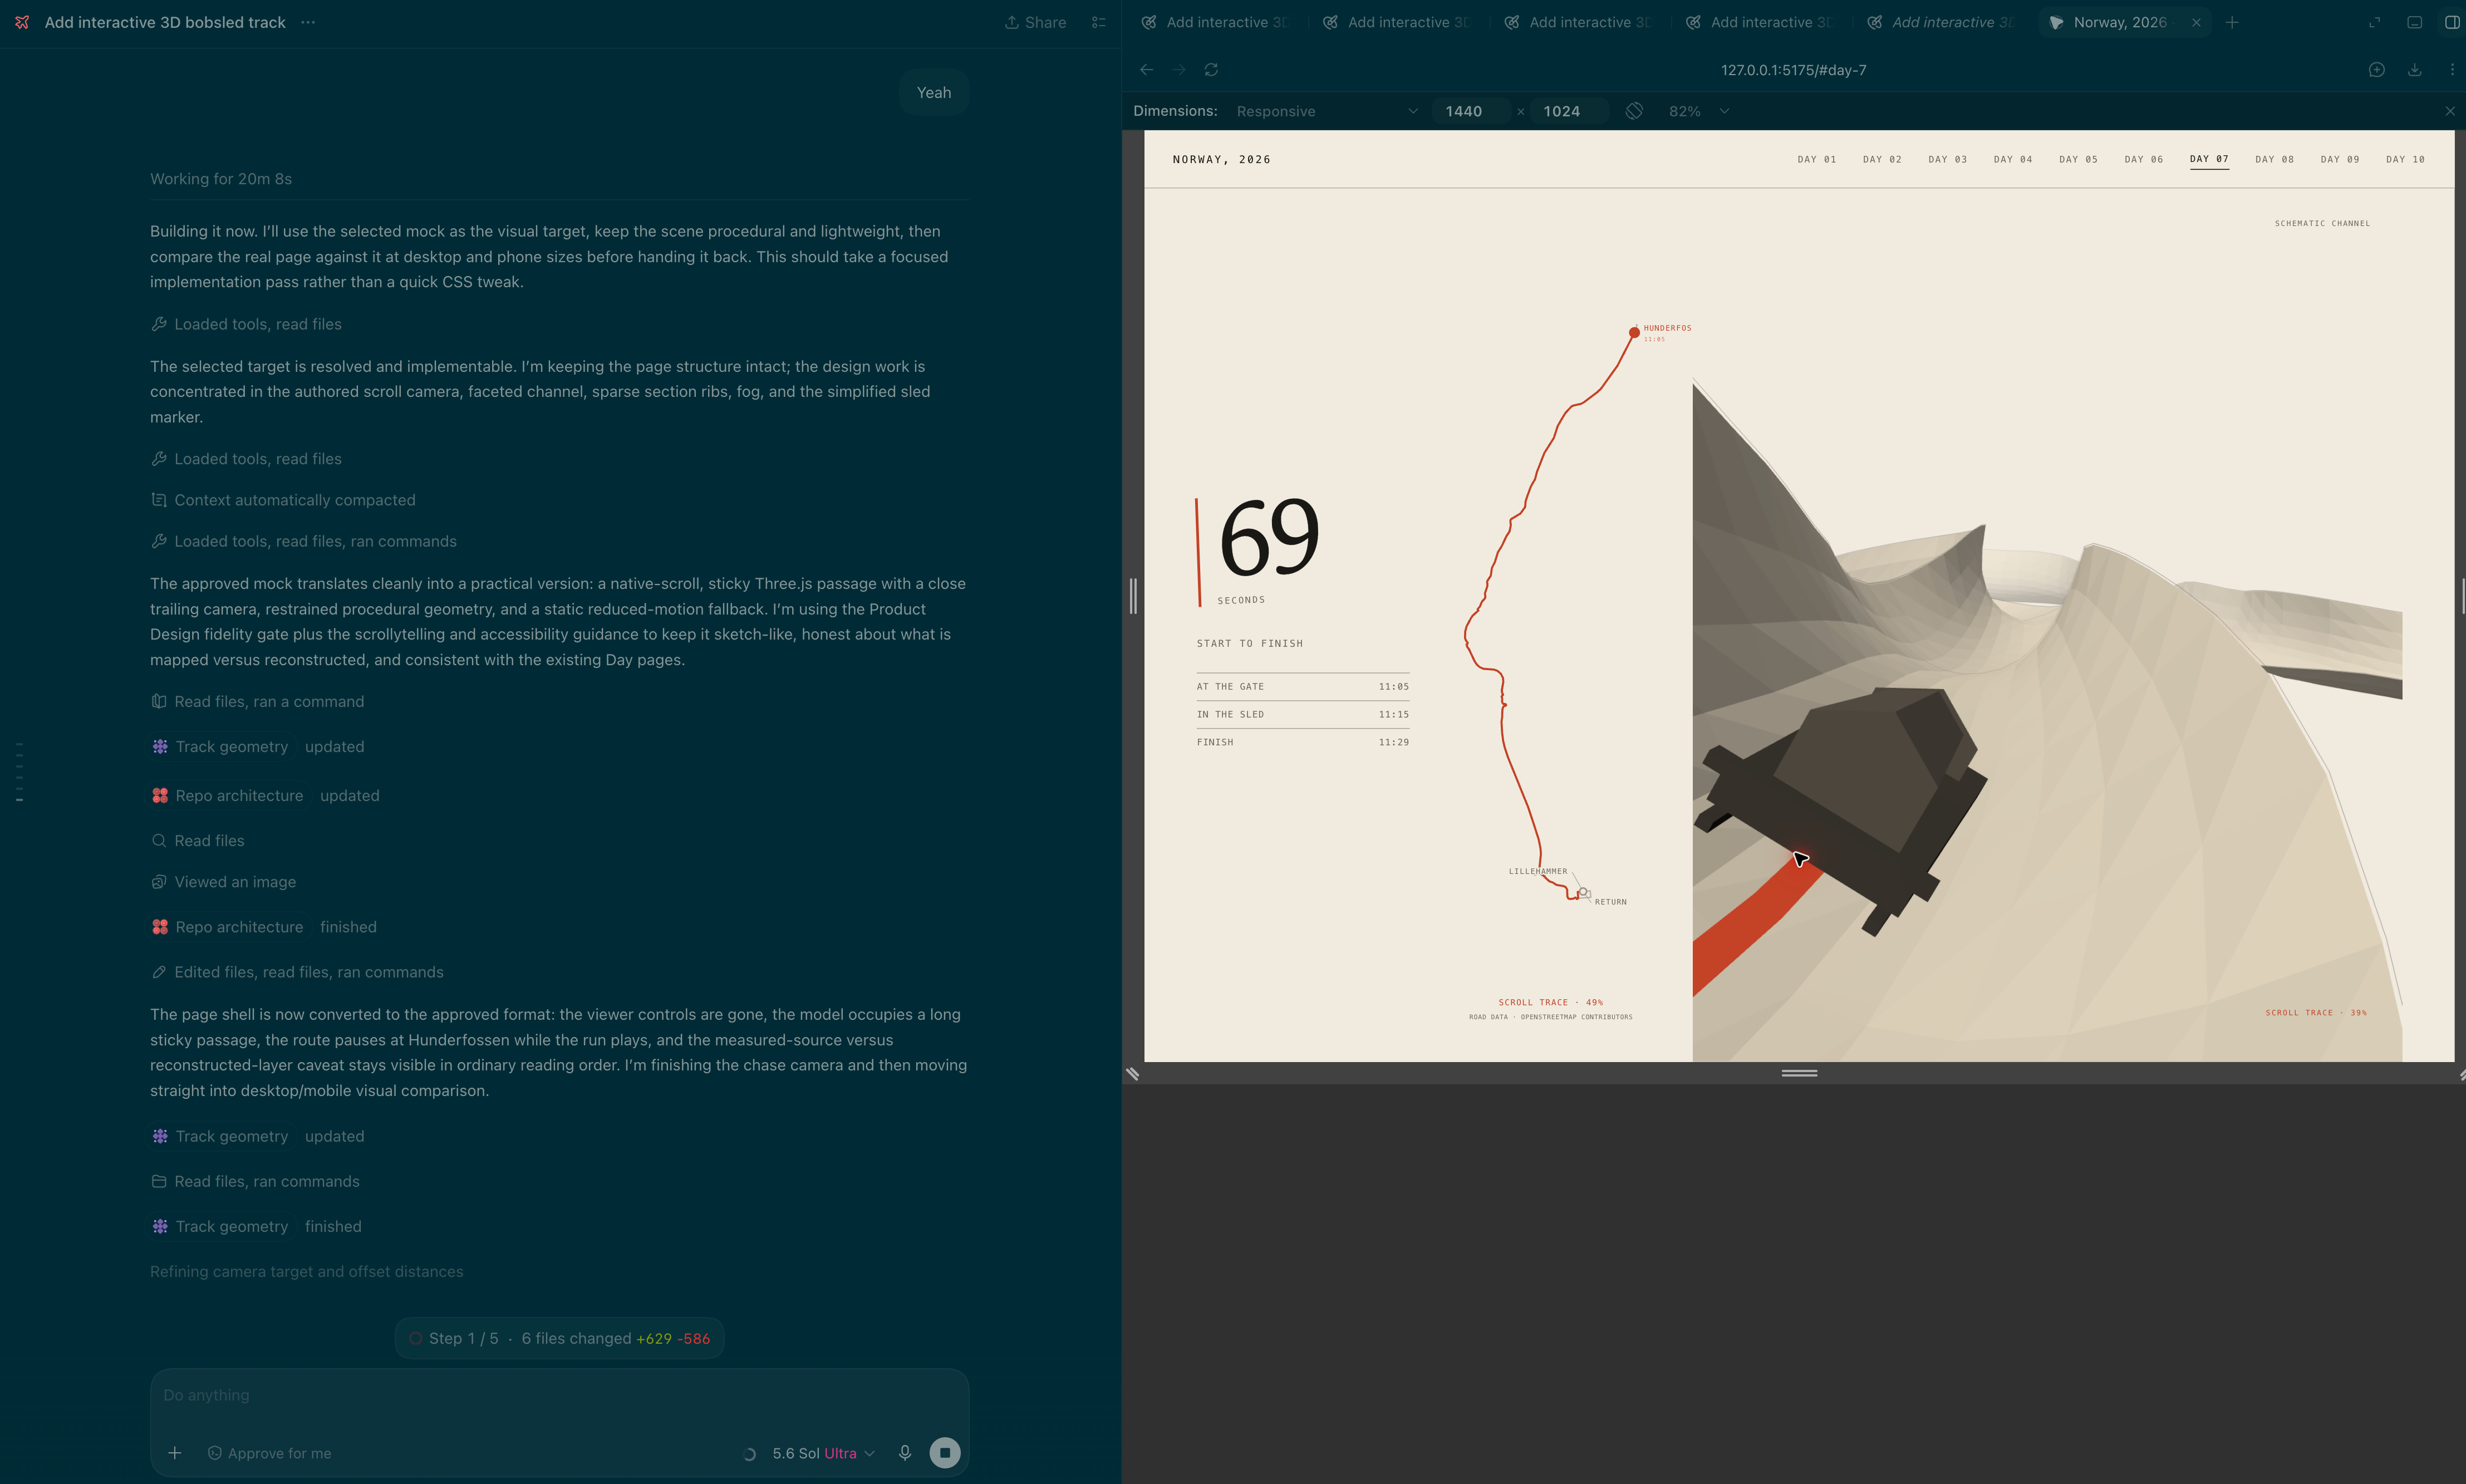
Recovered video inspection frames
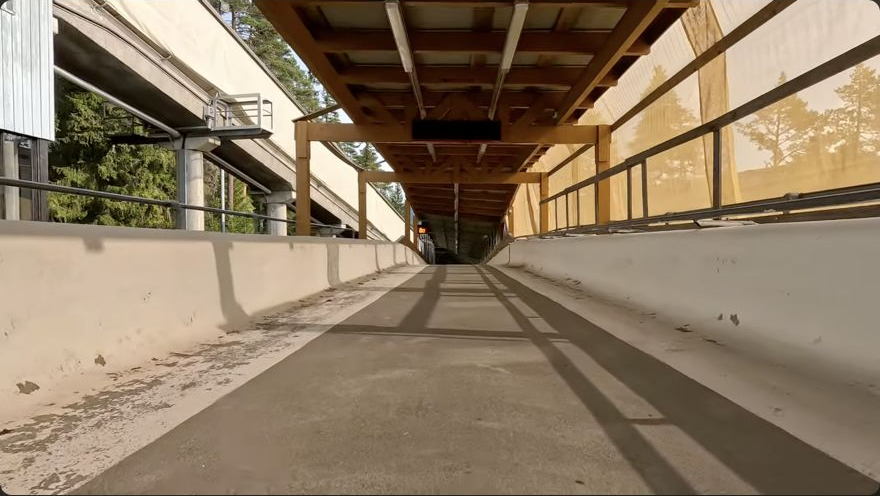
September 1. The start of the ride, captured during the video check. Video: POV Wheelbob Lillehammer by TrackTimingTechnician. 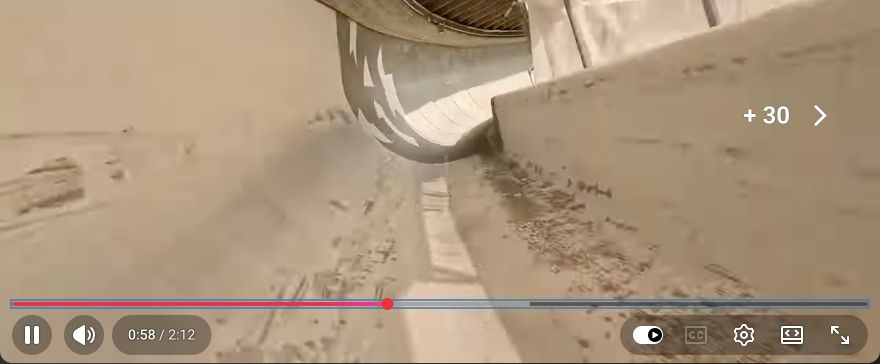
September 1. The banked turn at 0:58, captured during the same video check.
Codex checked the video against the model and found that the bank was reversed. I figured an Olympic track would have plenty of detailed drawings, especially with all the racing it's used for. I kept asking Codex to find them.
The recovered track references
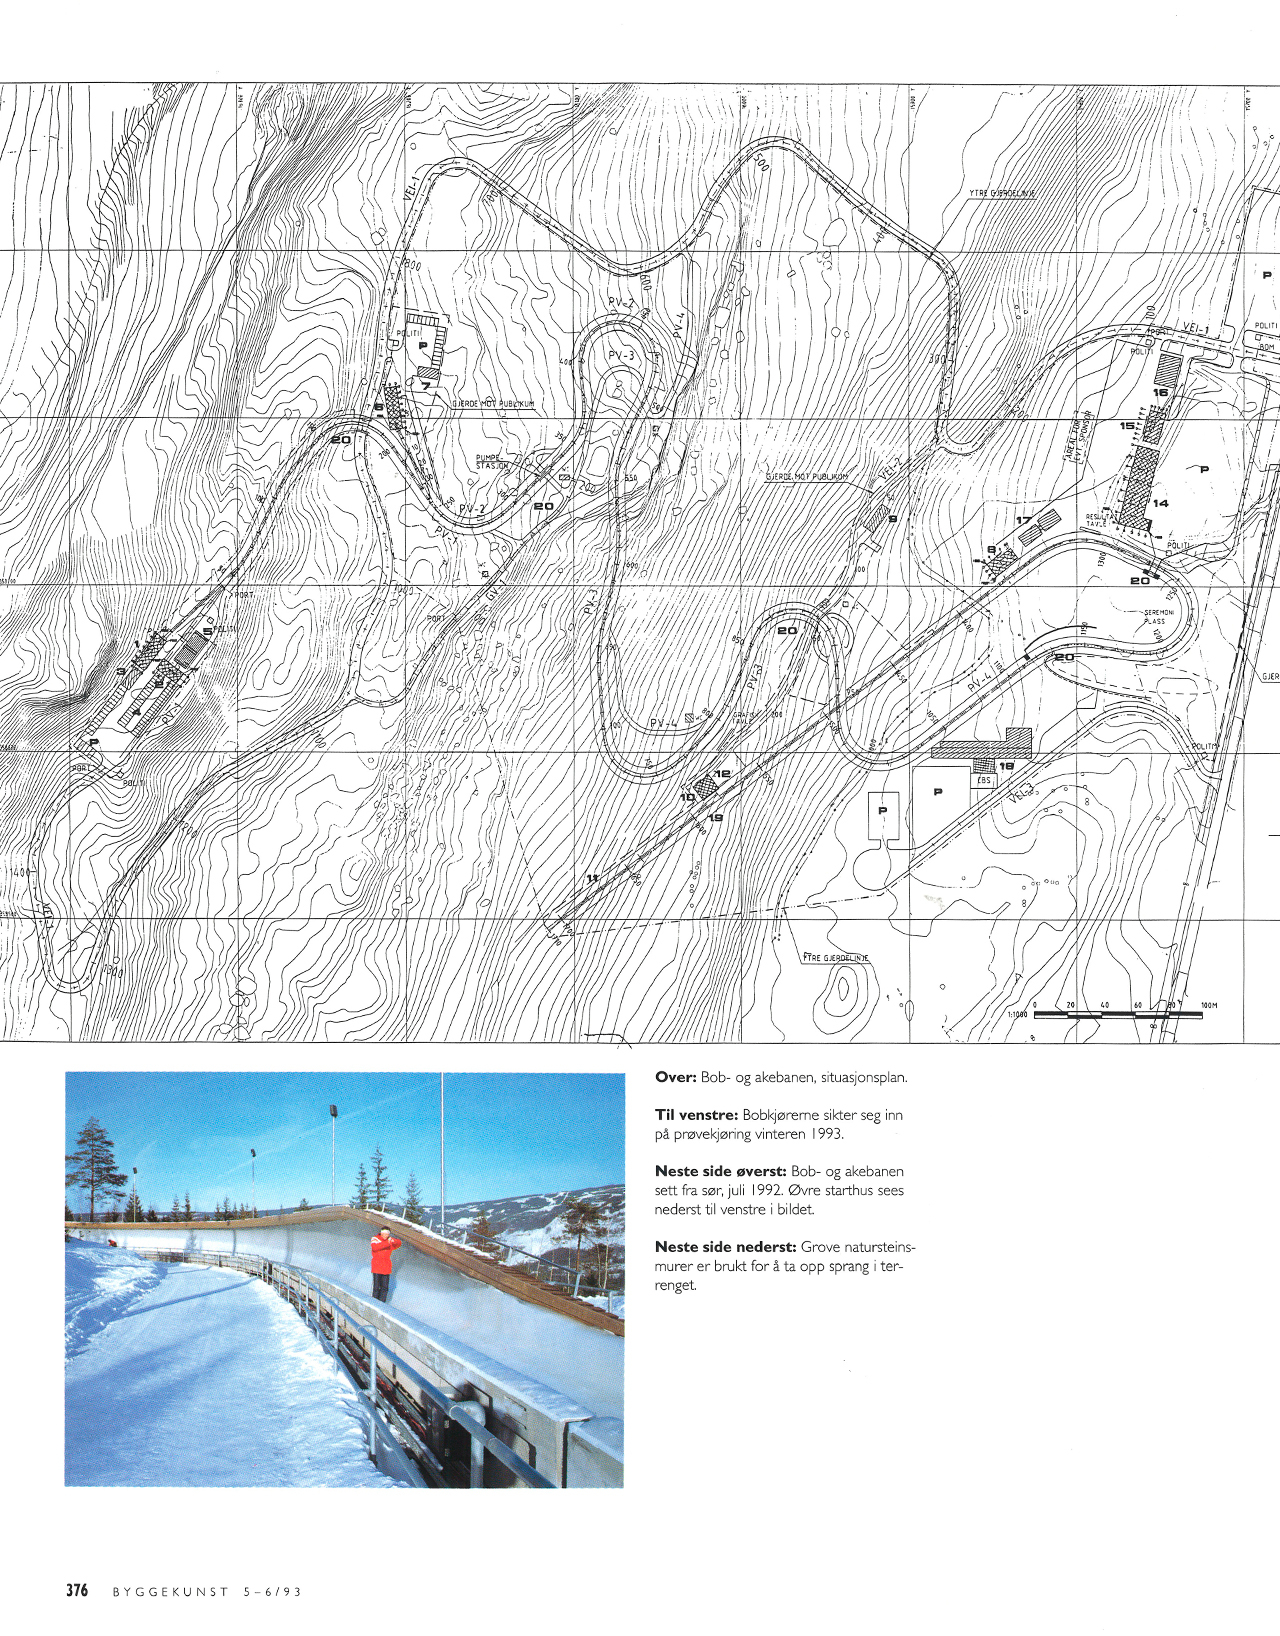
The 1993 track plan found during the bank correction. Source: Byggekunst 5–6/1993, page 376, Arkitektur N. 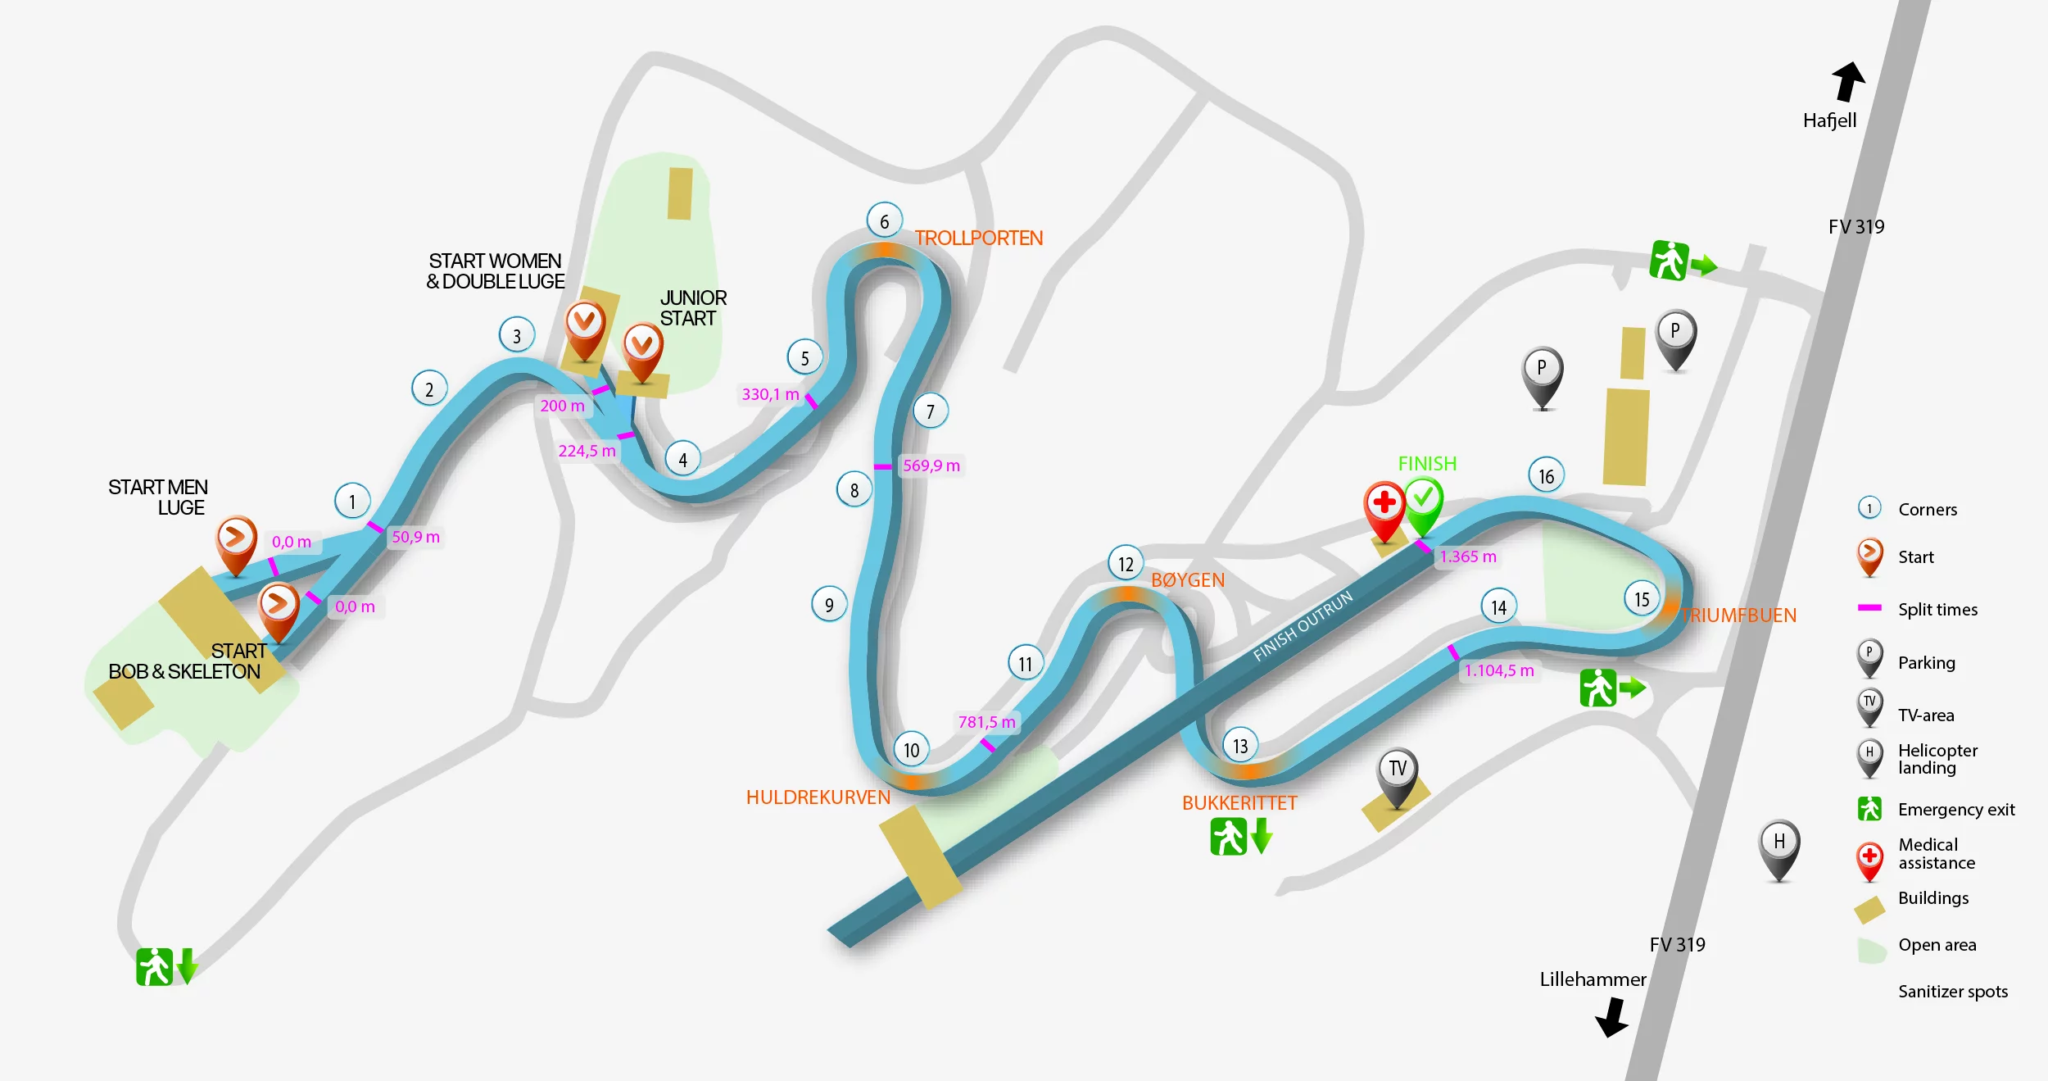
The operator's map, used to check the bends. Source: Olympiaparken.
Codex found a 1993 site plan and the operator's map, but I was surprised how little was available online. Maybe more of it just hasn't been digitized. What we found helped us check the bends, though we still didn't have exact measurements for every bank.
A later recording of the ride
September 1. A later version after track, sled, and style corrections. Silent recording.
Push for the drawings
Once I had my crazy little bobsled mini-game working, I started thinking about other parts of the trip where we could try something similar.
One was Hardanger Bridge, which I'd crossed the year before with friends. You drive through a 7 km tunnel and an underground roundabout, then get spat out onto this modern suspension bridge. It feels like a scene from Blade Runner 2049. I wanted to recreate that on the site.
The initial bridge concepts
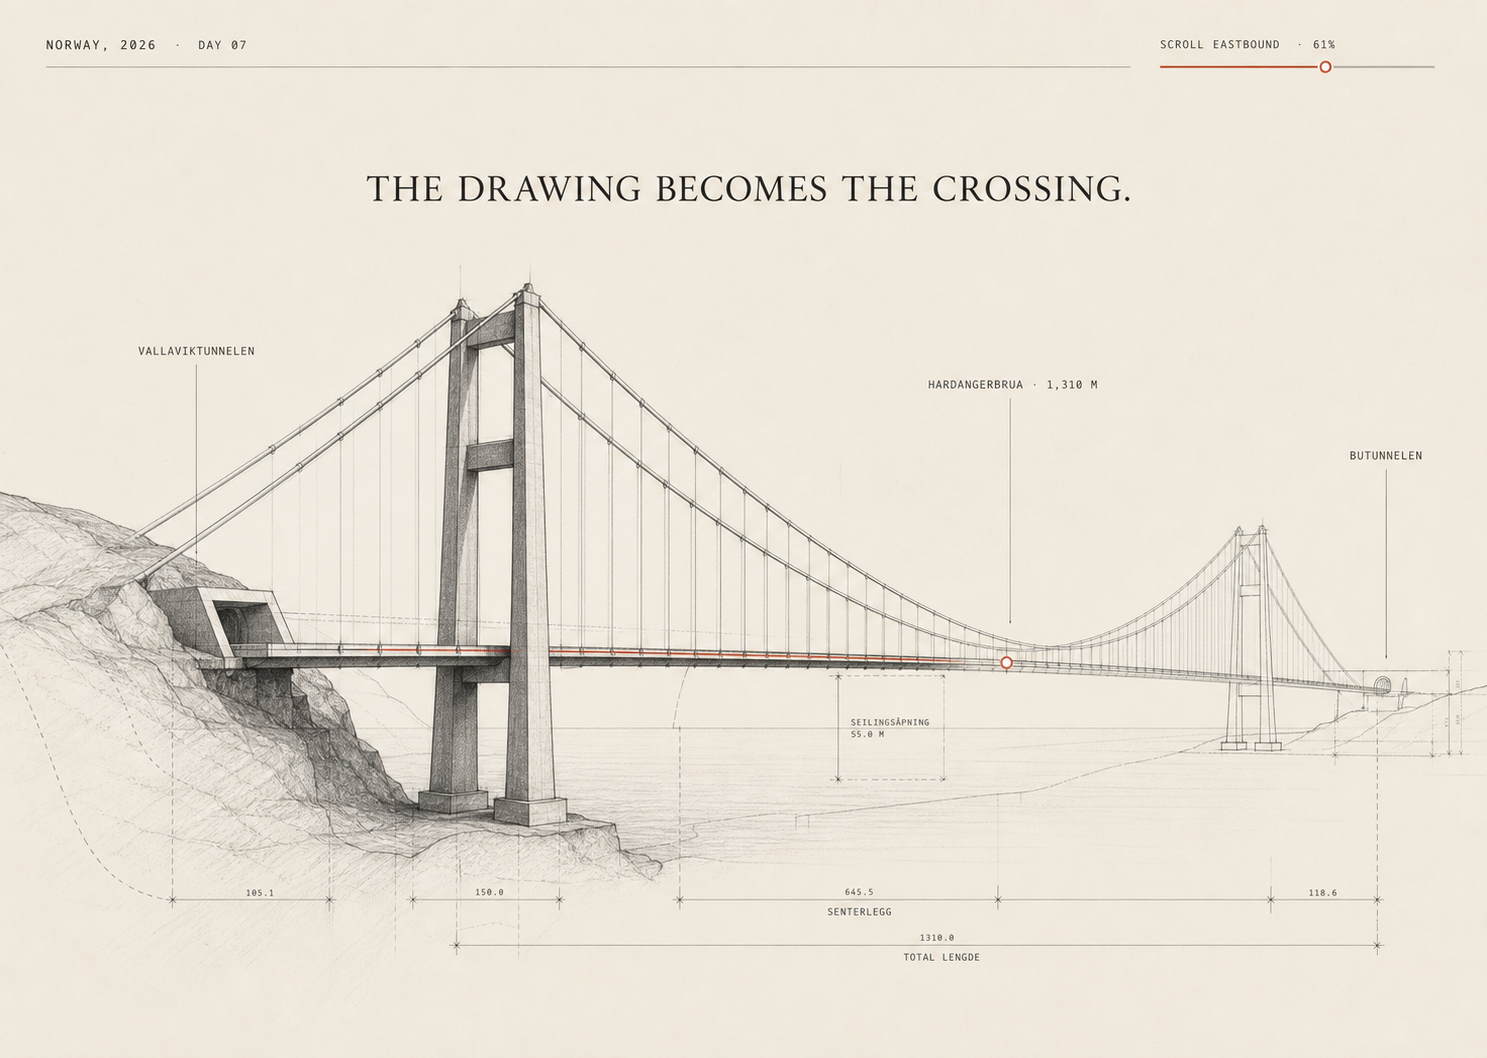
September 2. A generated side-view concept with illustrative dimensions. Image: GPT Image, directed with GPT‑5.6 Sol. 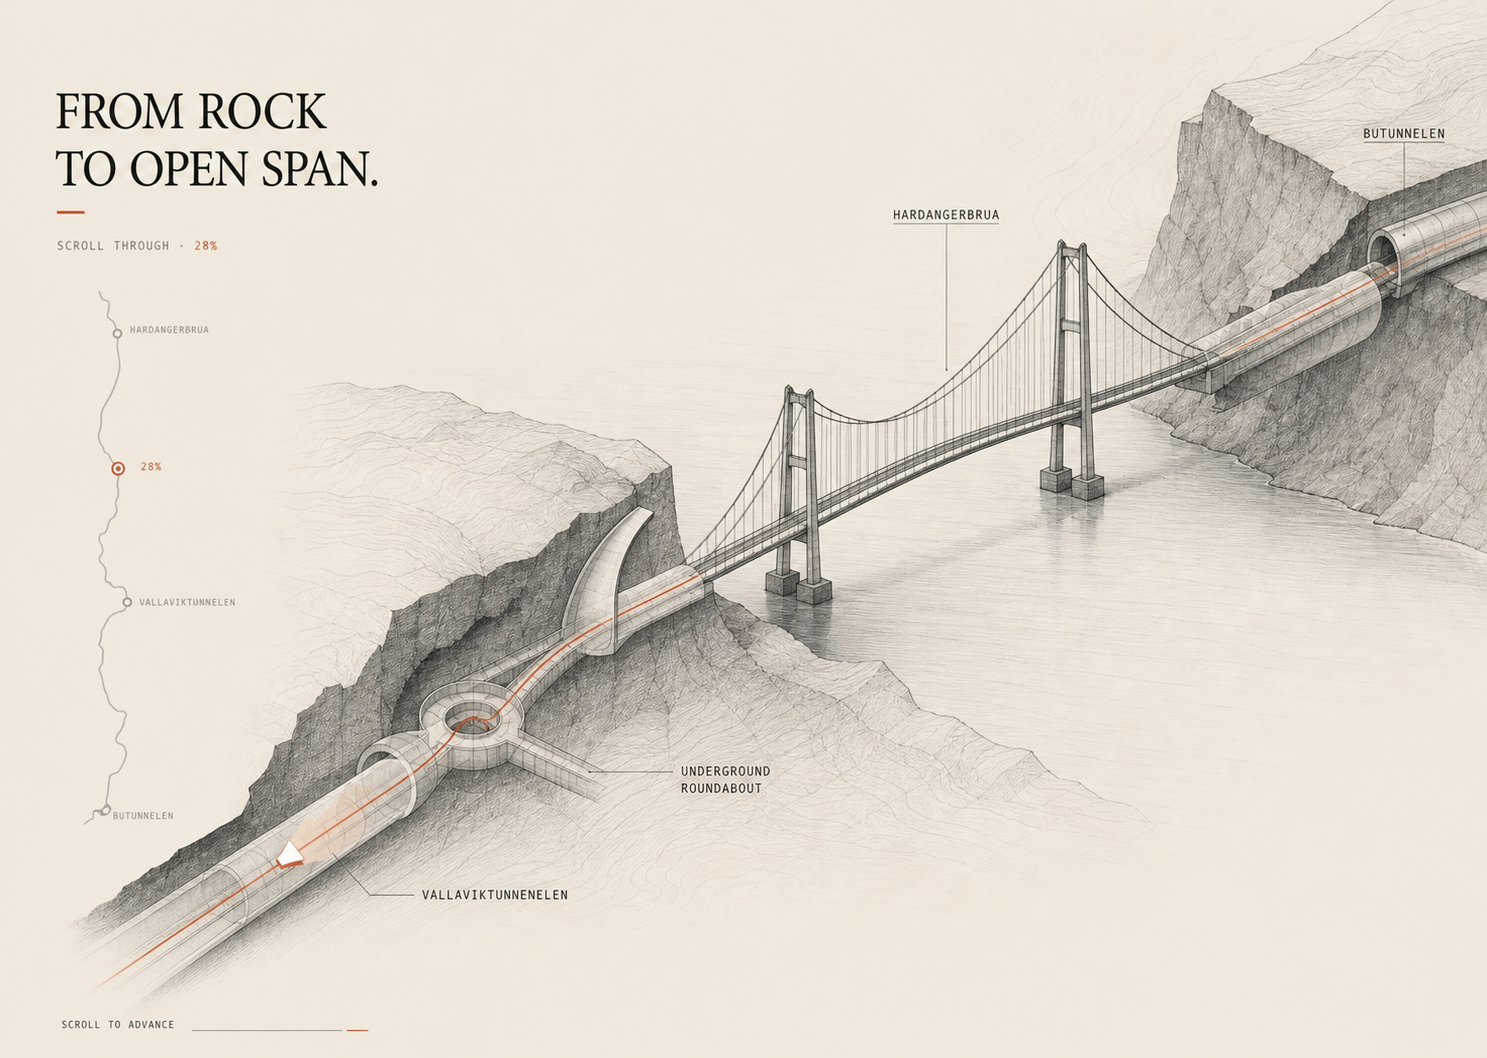
September 2. A generated cutaway of the tunnels and underground roundabout. Image: GPT Image, directed with GPT‑5.6 Sol.
I liked the cutaway showing how the tunnels connected to the bridge, and I liked the view from the road. I asked Codex to combine them so we could move from the drawing into the crossing.
Combined concept
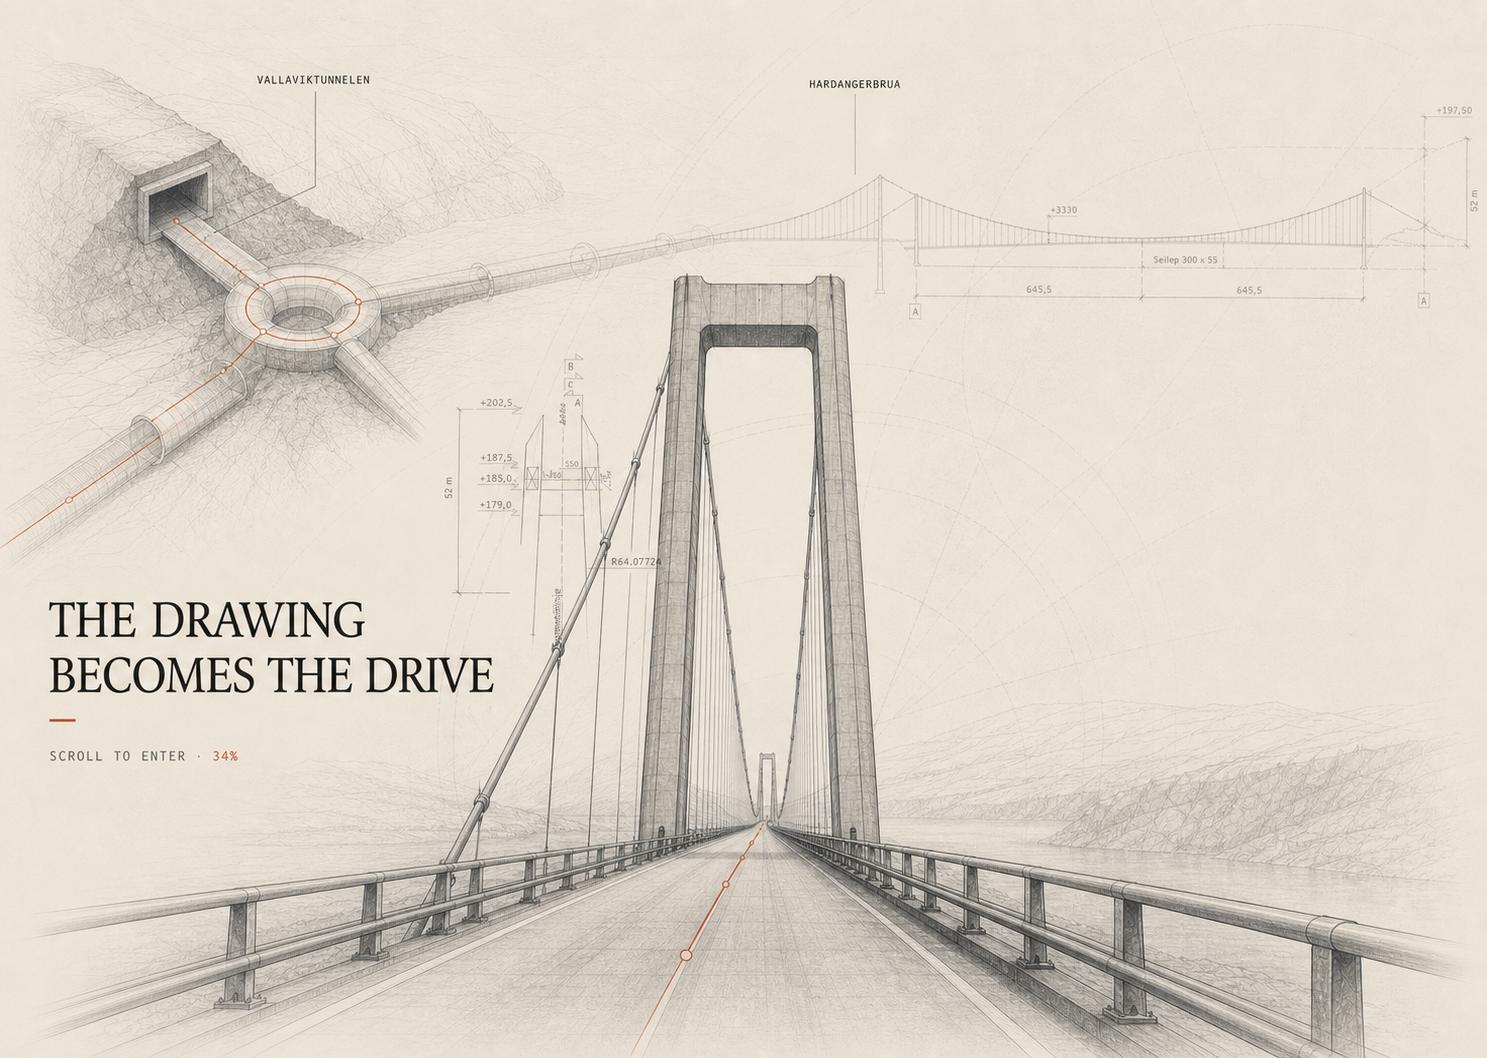
September 2. The combined camera concept. Real construction drawings supplied the model dimensions. Image: GPT Image, directed with GPT‑5.6 Sol.
After a few rounds of concept art with ChatGPT, I kept asking for blueprints and as much data about the bridge as possible. I figured there had to be engineering drawings somewhere that we could build a model from.
Construction drawings recovered from the research
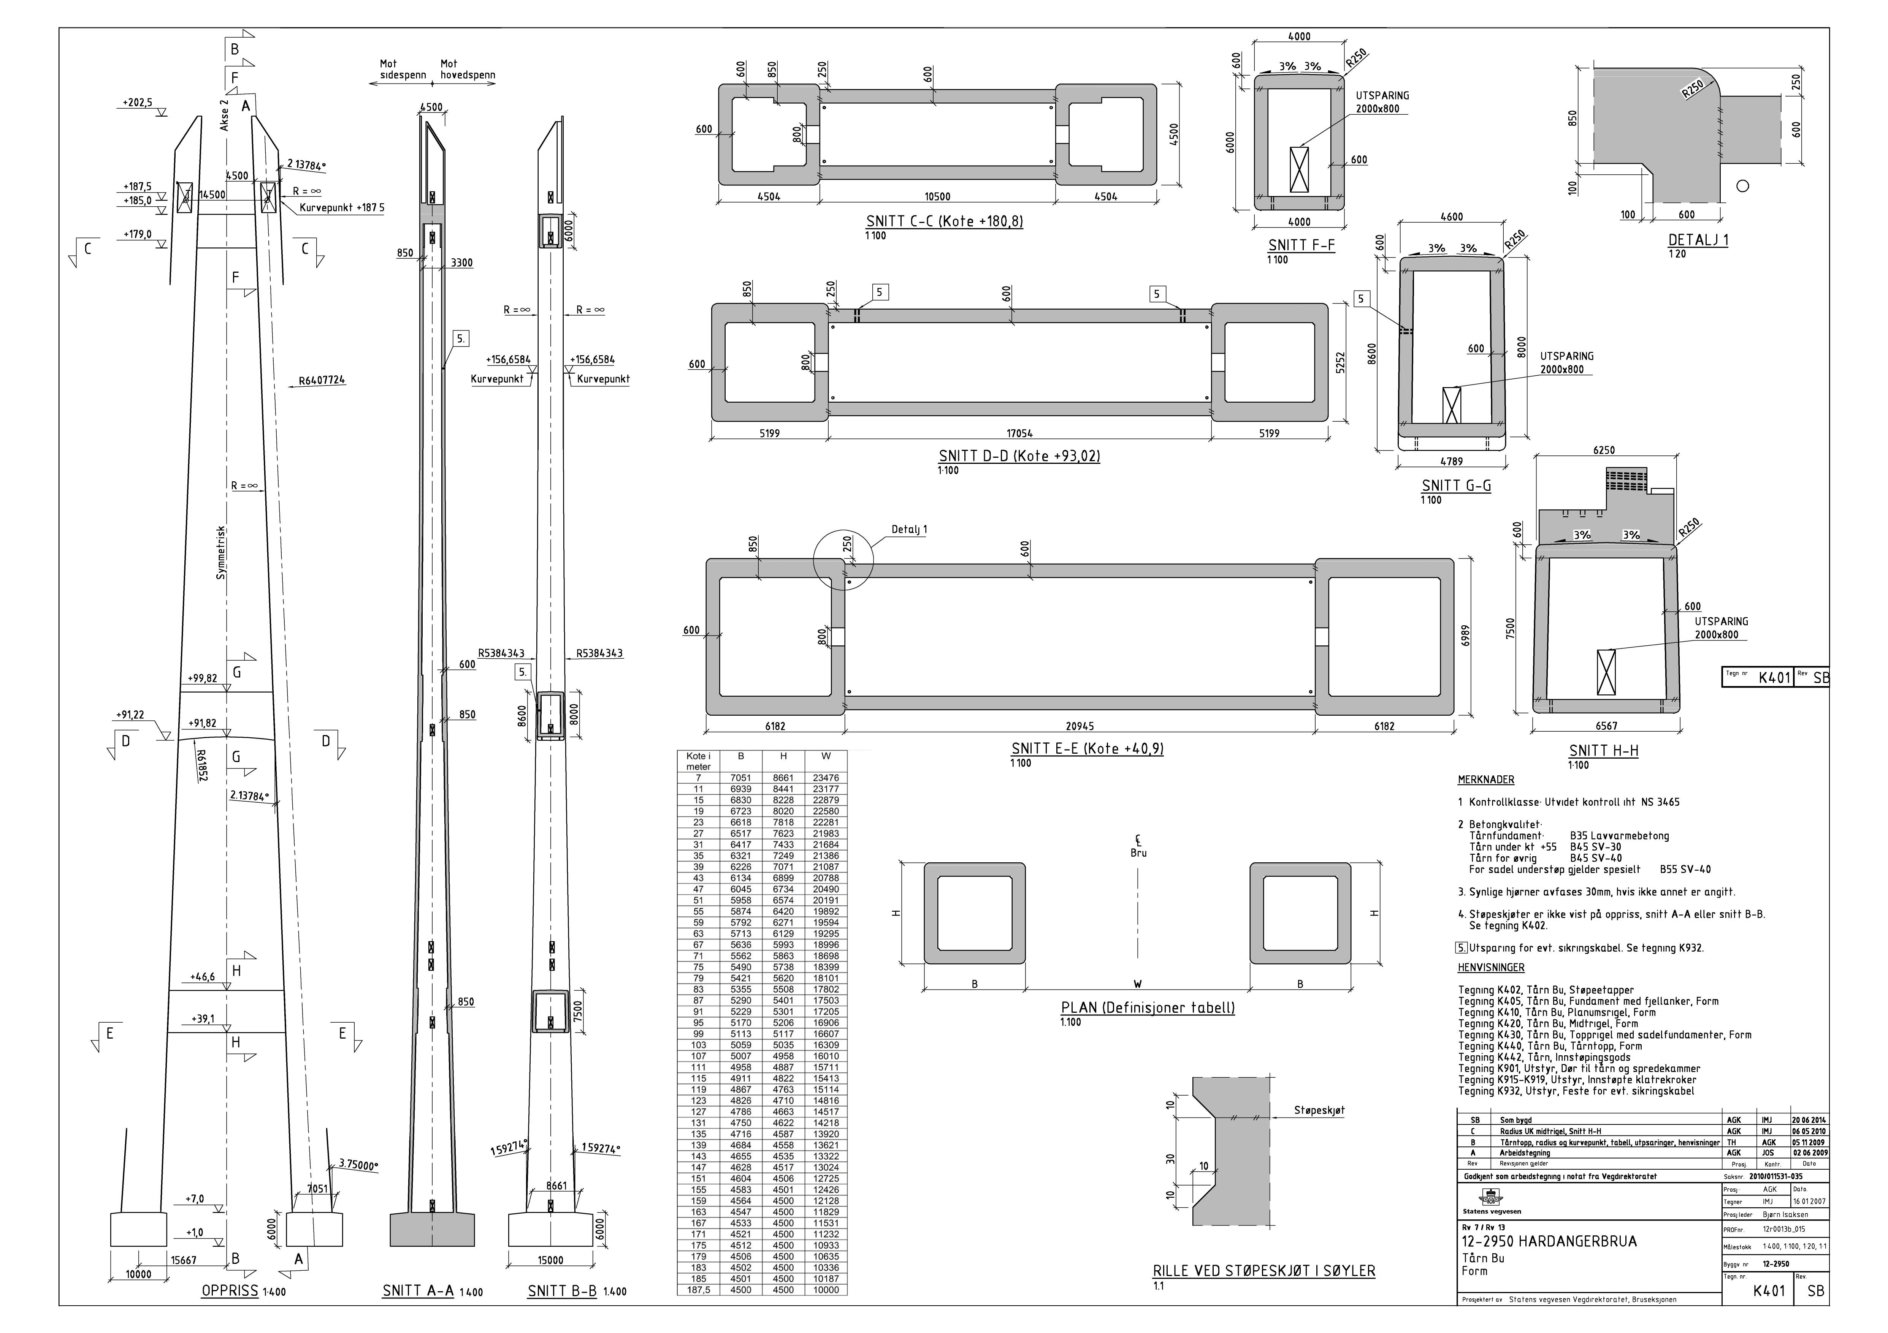
K401. Tower dimensions from Statens vegvesen, public tender drawing archive. 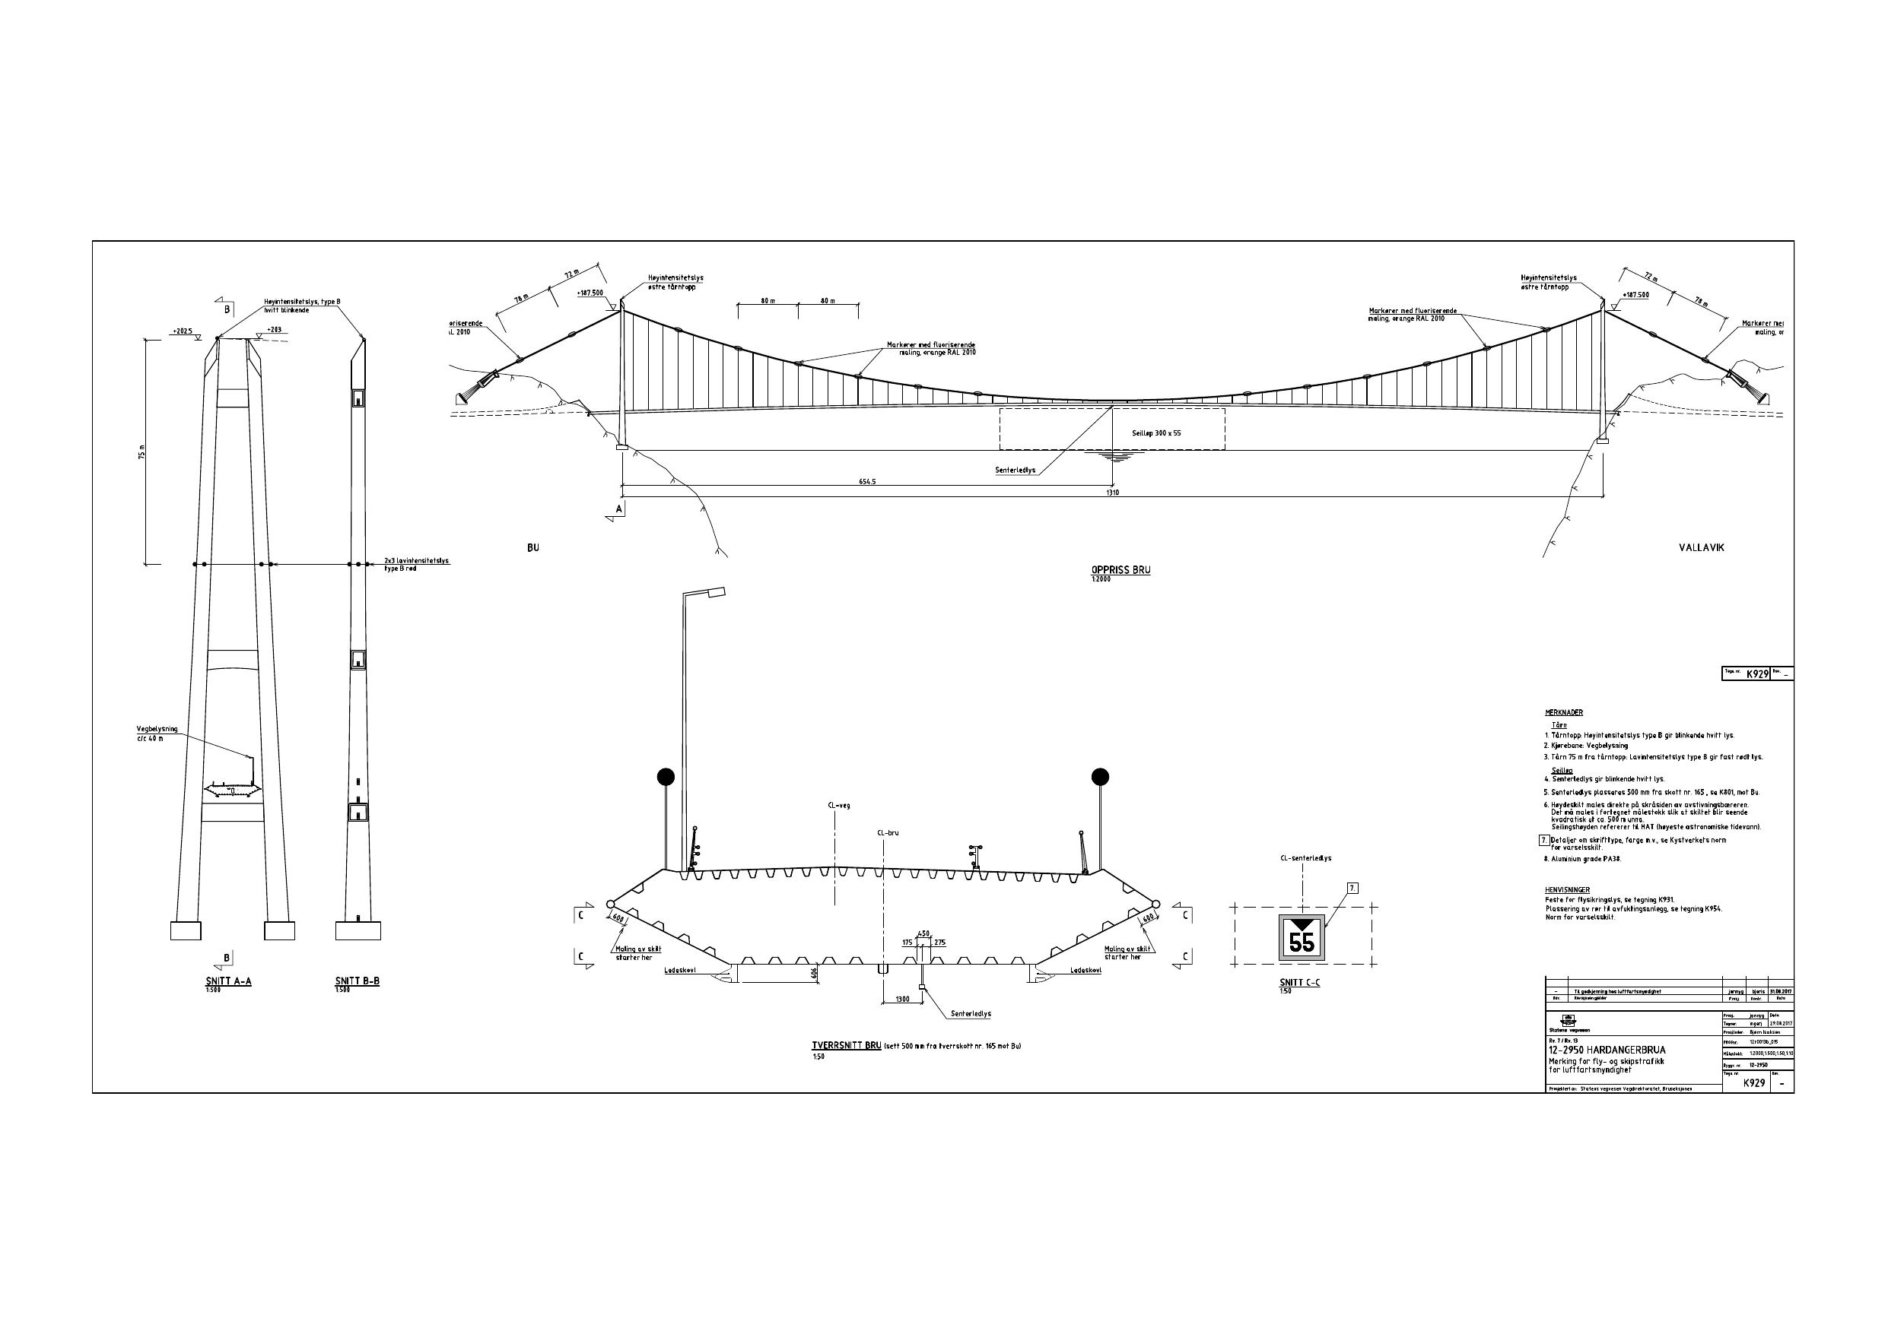
K929. The bridge and road-deck section. Source: Statens vegvesen.
Codex found construction drawings in a public tender archive. I kept them open beside the chat and watched it slowly build a 3D model from the blueprints.
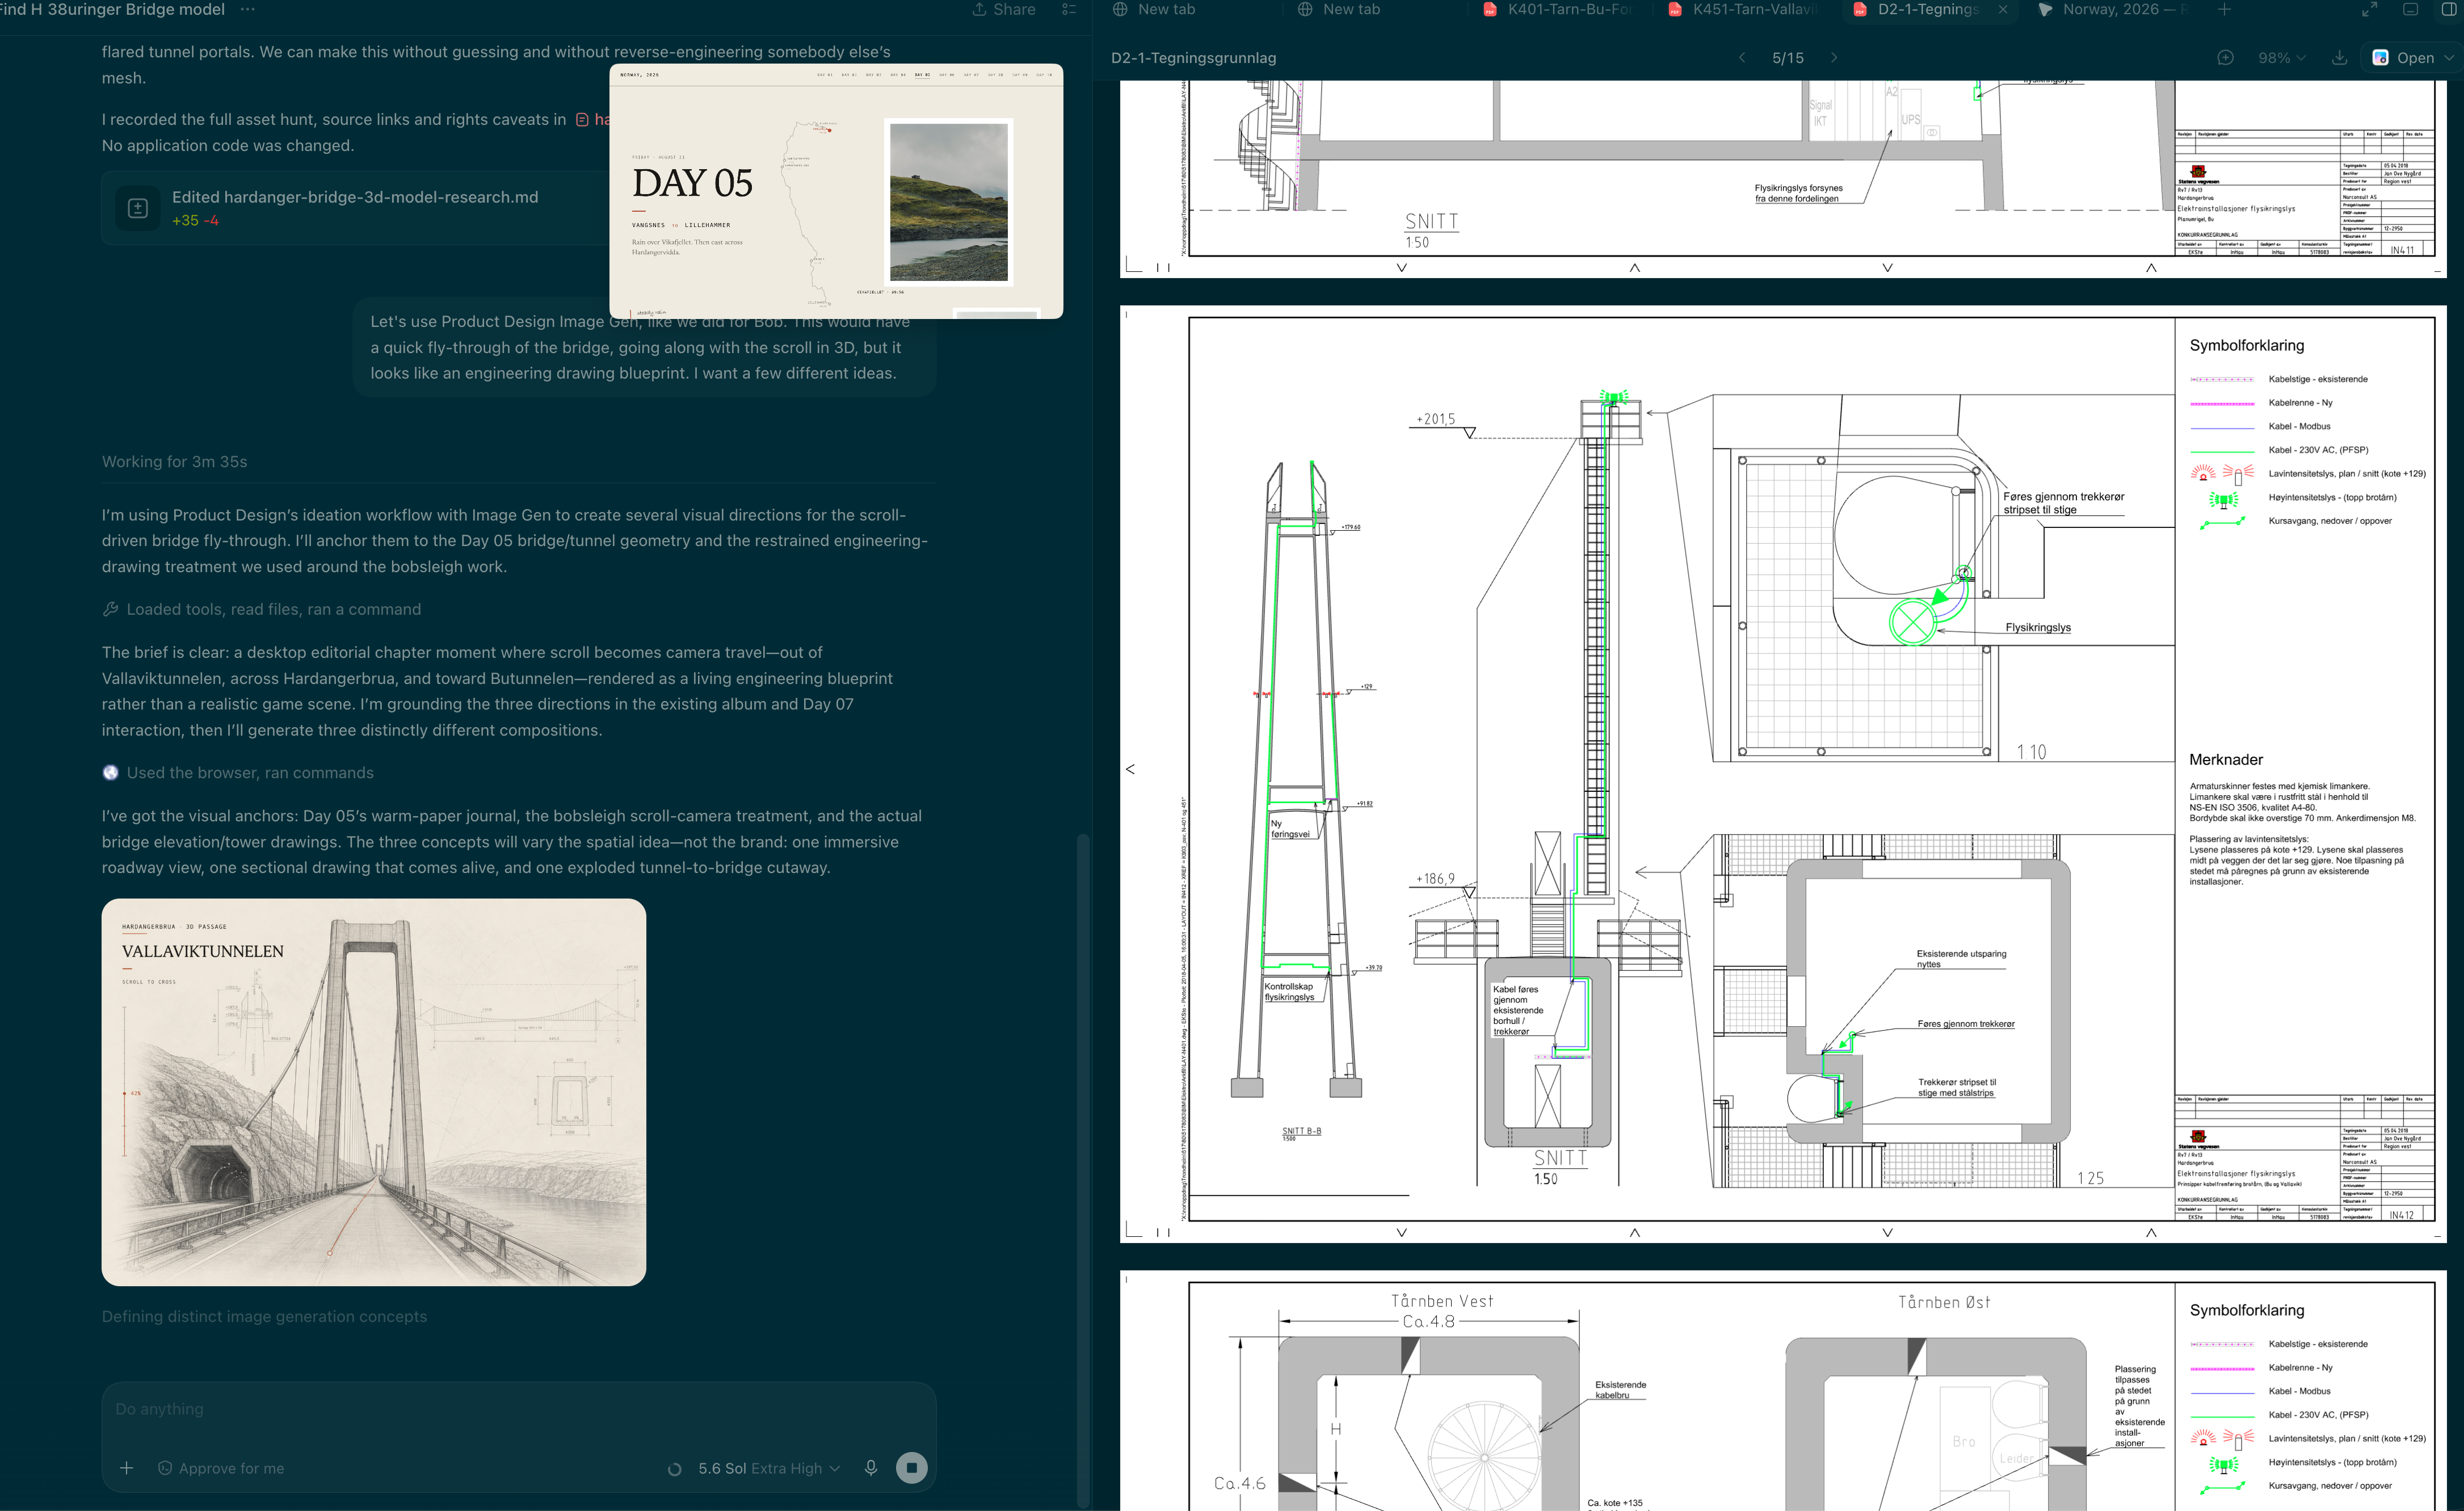
I kept using the concept to guide how the crossing should feel, and the construction drawings to check the structure. With both, we could keep refining the model and the movement.
The working crossing
September 2. The early drawing-to-crossing sequence. Silent recording.
Modeling the spiral
I'd visited Copenhagen on my own the day before the Norway trip. I wanted to show my climb around the outside of the tower at Vor Frelsers Kirke. After building the bridge, I figured we could find drawings to build the tower from too.
I gave Codex my photographs and asked for a sketch concept in the style of the other models.
The selected tower concept
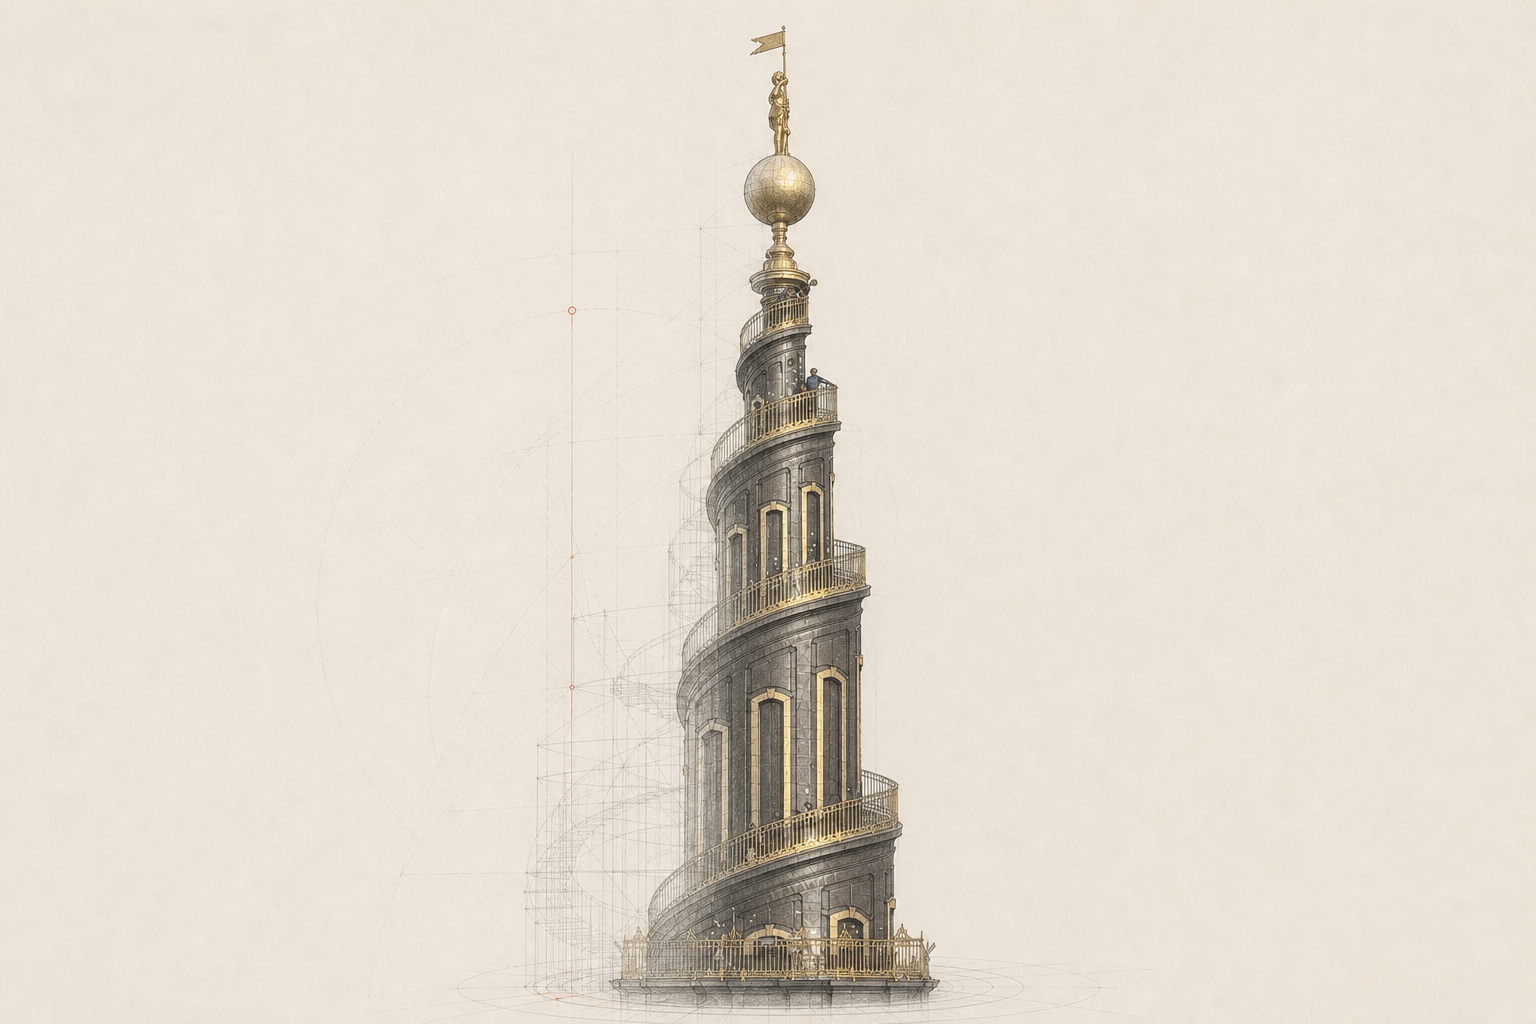
September 2. The sketch concept I chose as a target for the tower rebuild. Image: GPT Image, directed with GPT‑5.6 Sol.
I liked this direction, but the early working model looked like a cone with stairs attached. I kept pushing for better drawings so we could get the shape closer.
The museum elevation and plans
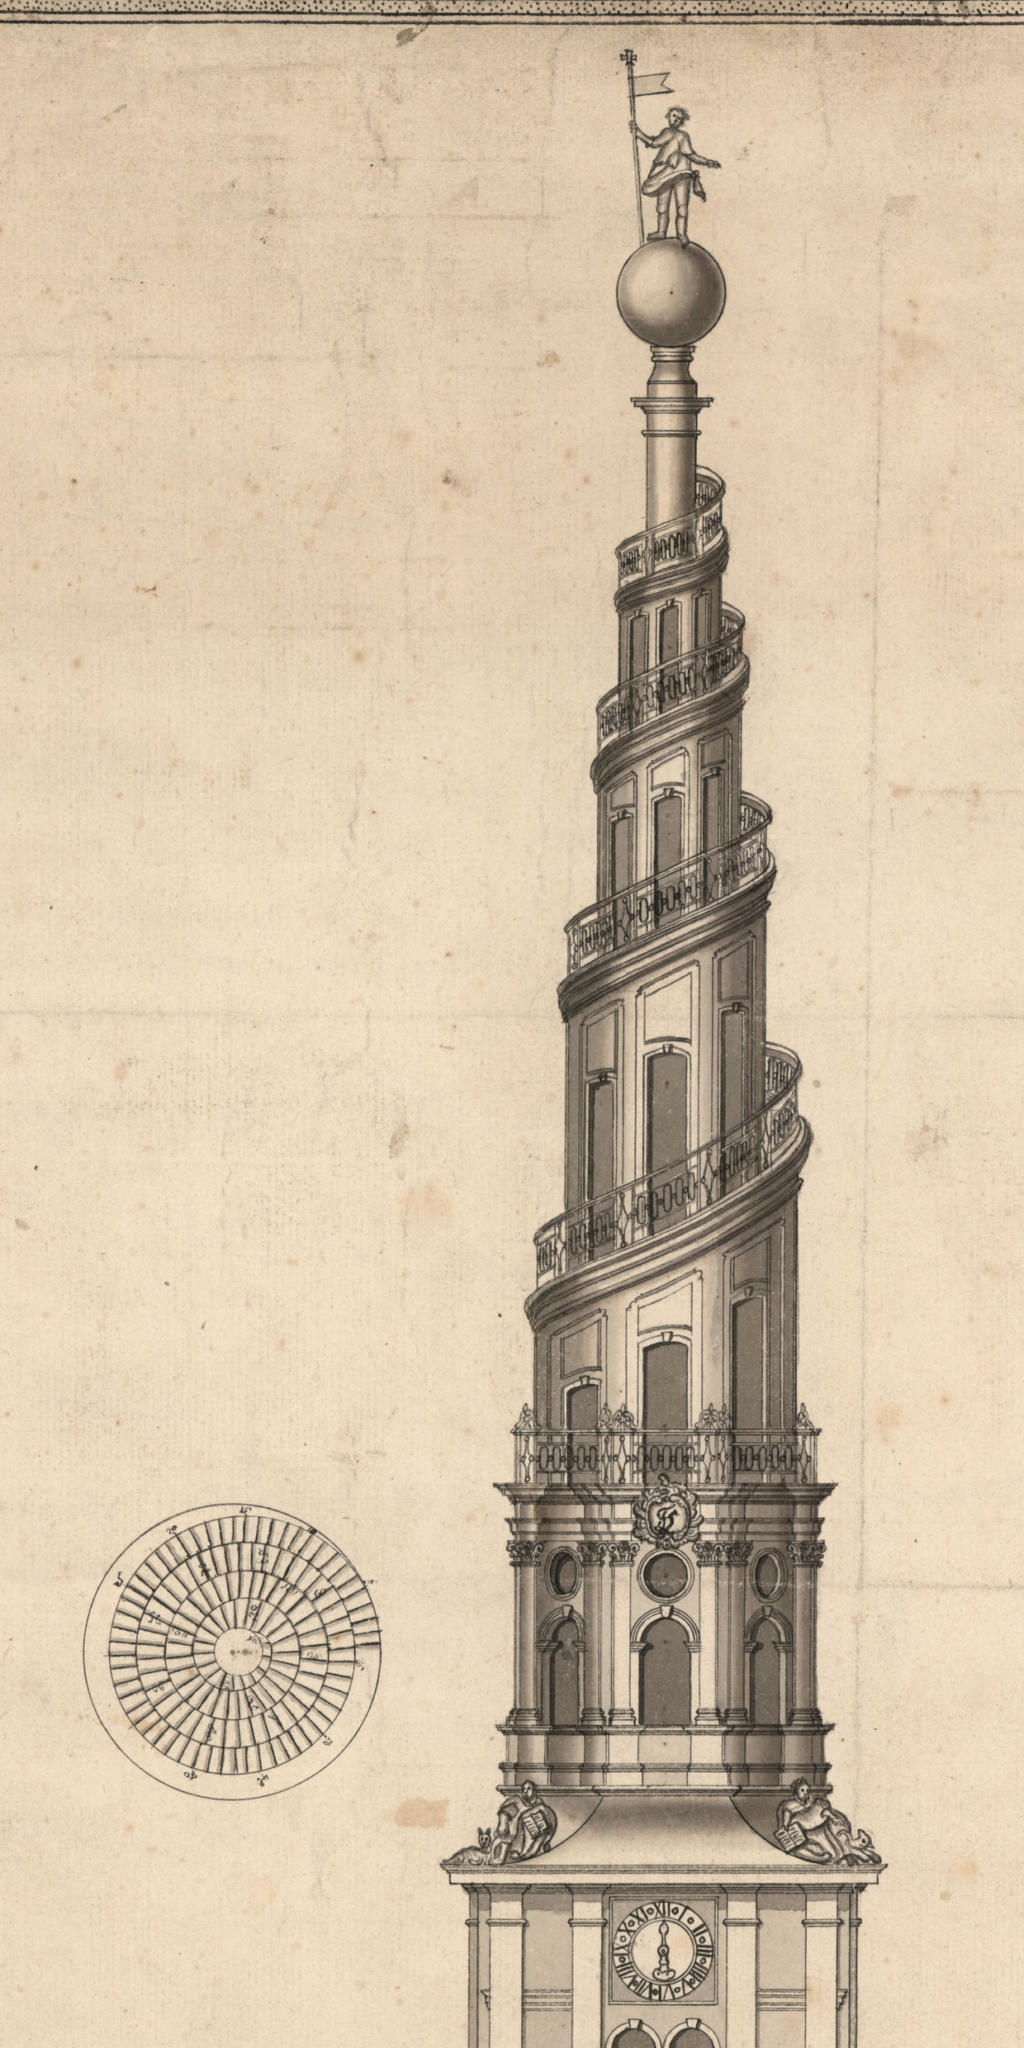
The measured spire drawing, attributed to Lauritz de Thurah. Nationalmuseet, DMR-174031. Public domain. 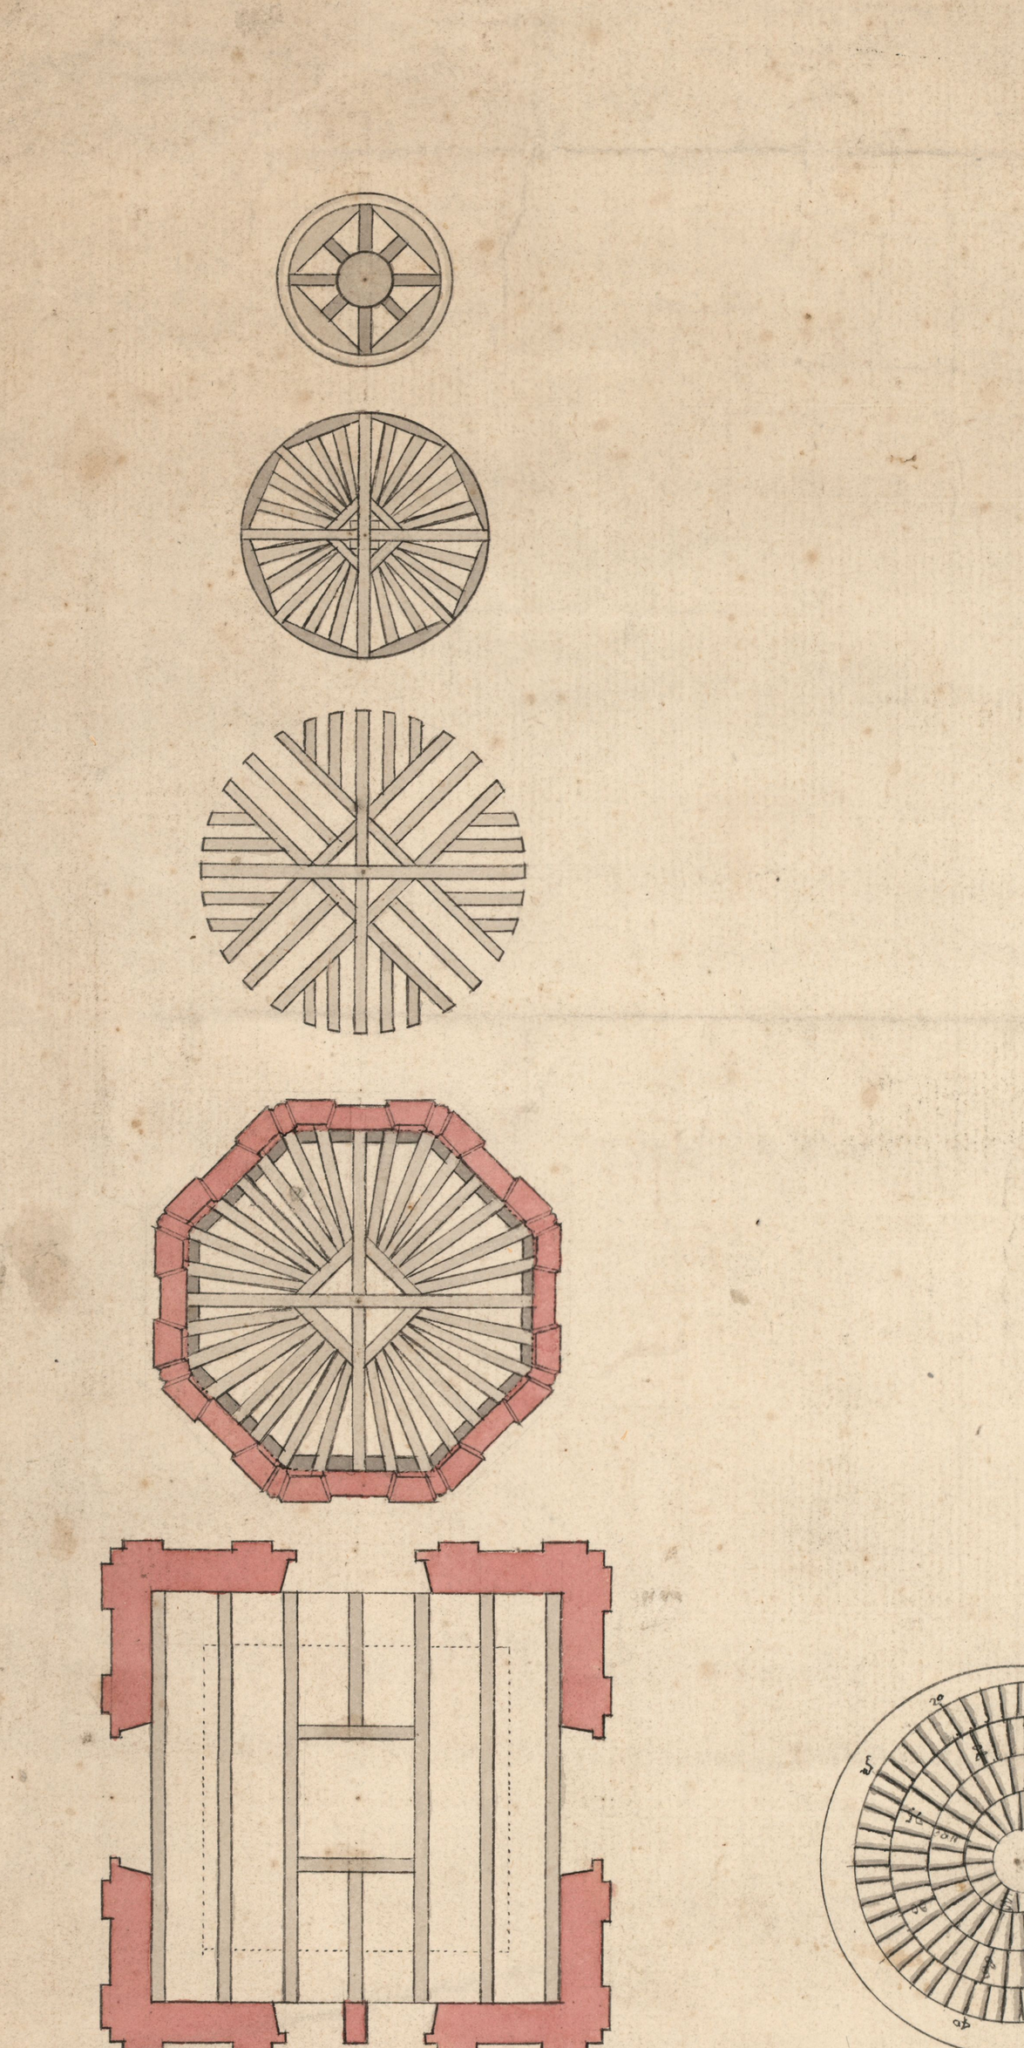
Plans from the same sheet showing the eight-sided structure. Nationalmuseet, DMR-174031. Public domain.
Codex found a measured drawing in the Danish National Museum's collection. It showed the eight-sided structure inside the winding staircase. Even with that, I kept getting a model that didn't look like the drawing.
I also tried asking ImageGen to make a clearer study of the proportions, using the photographs and drawings as references.
The generated proportion study
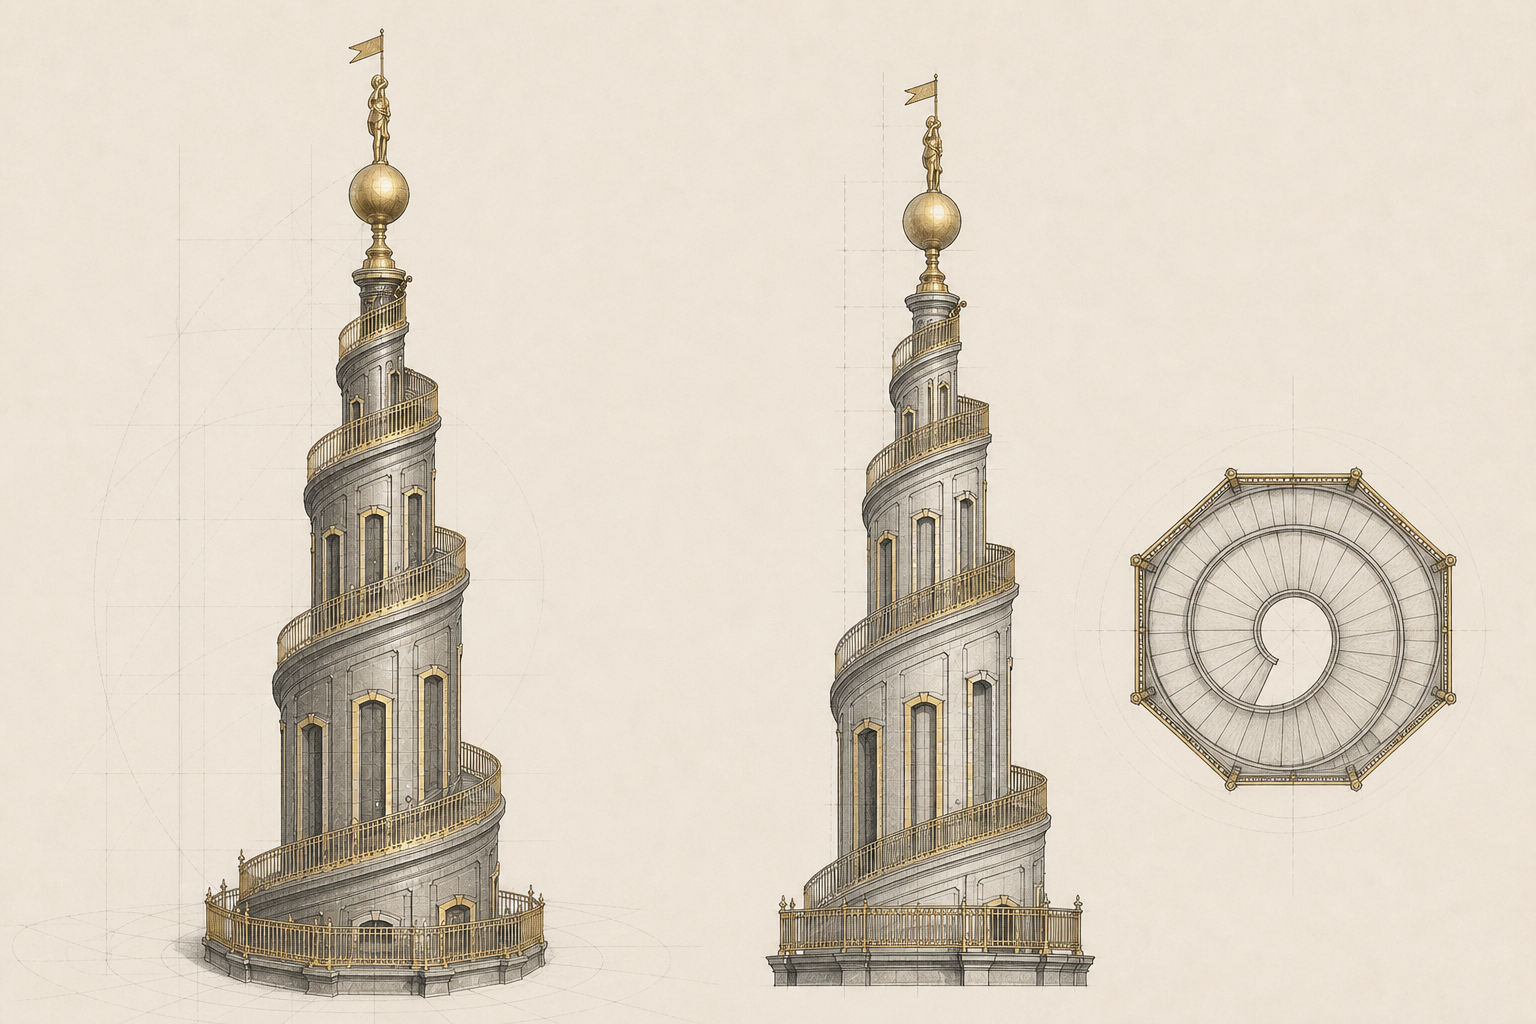
A generated tower study for the revisions. Image: GPT Image, directed with GPT‑5.6 Sol.
With GPT-5.6 Sol, I really couldn't get the model to be better. I kept giving it photographs, drawings, and feedback, but I couldn't get it where I wanted it.
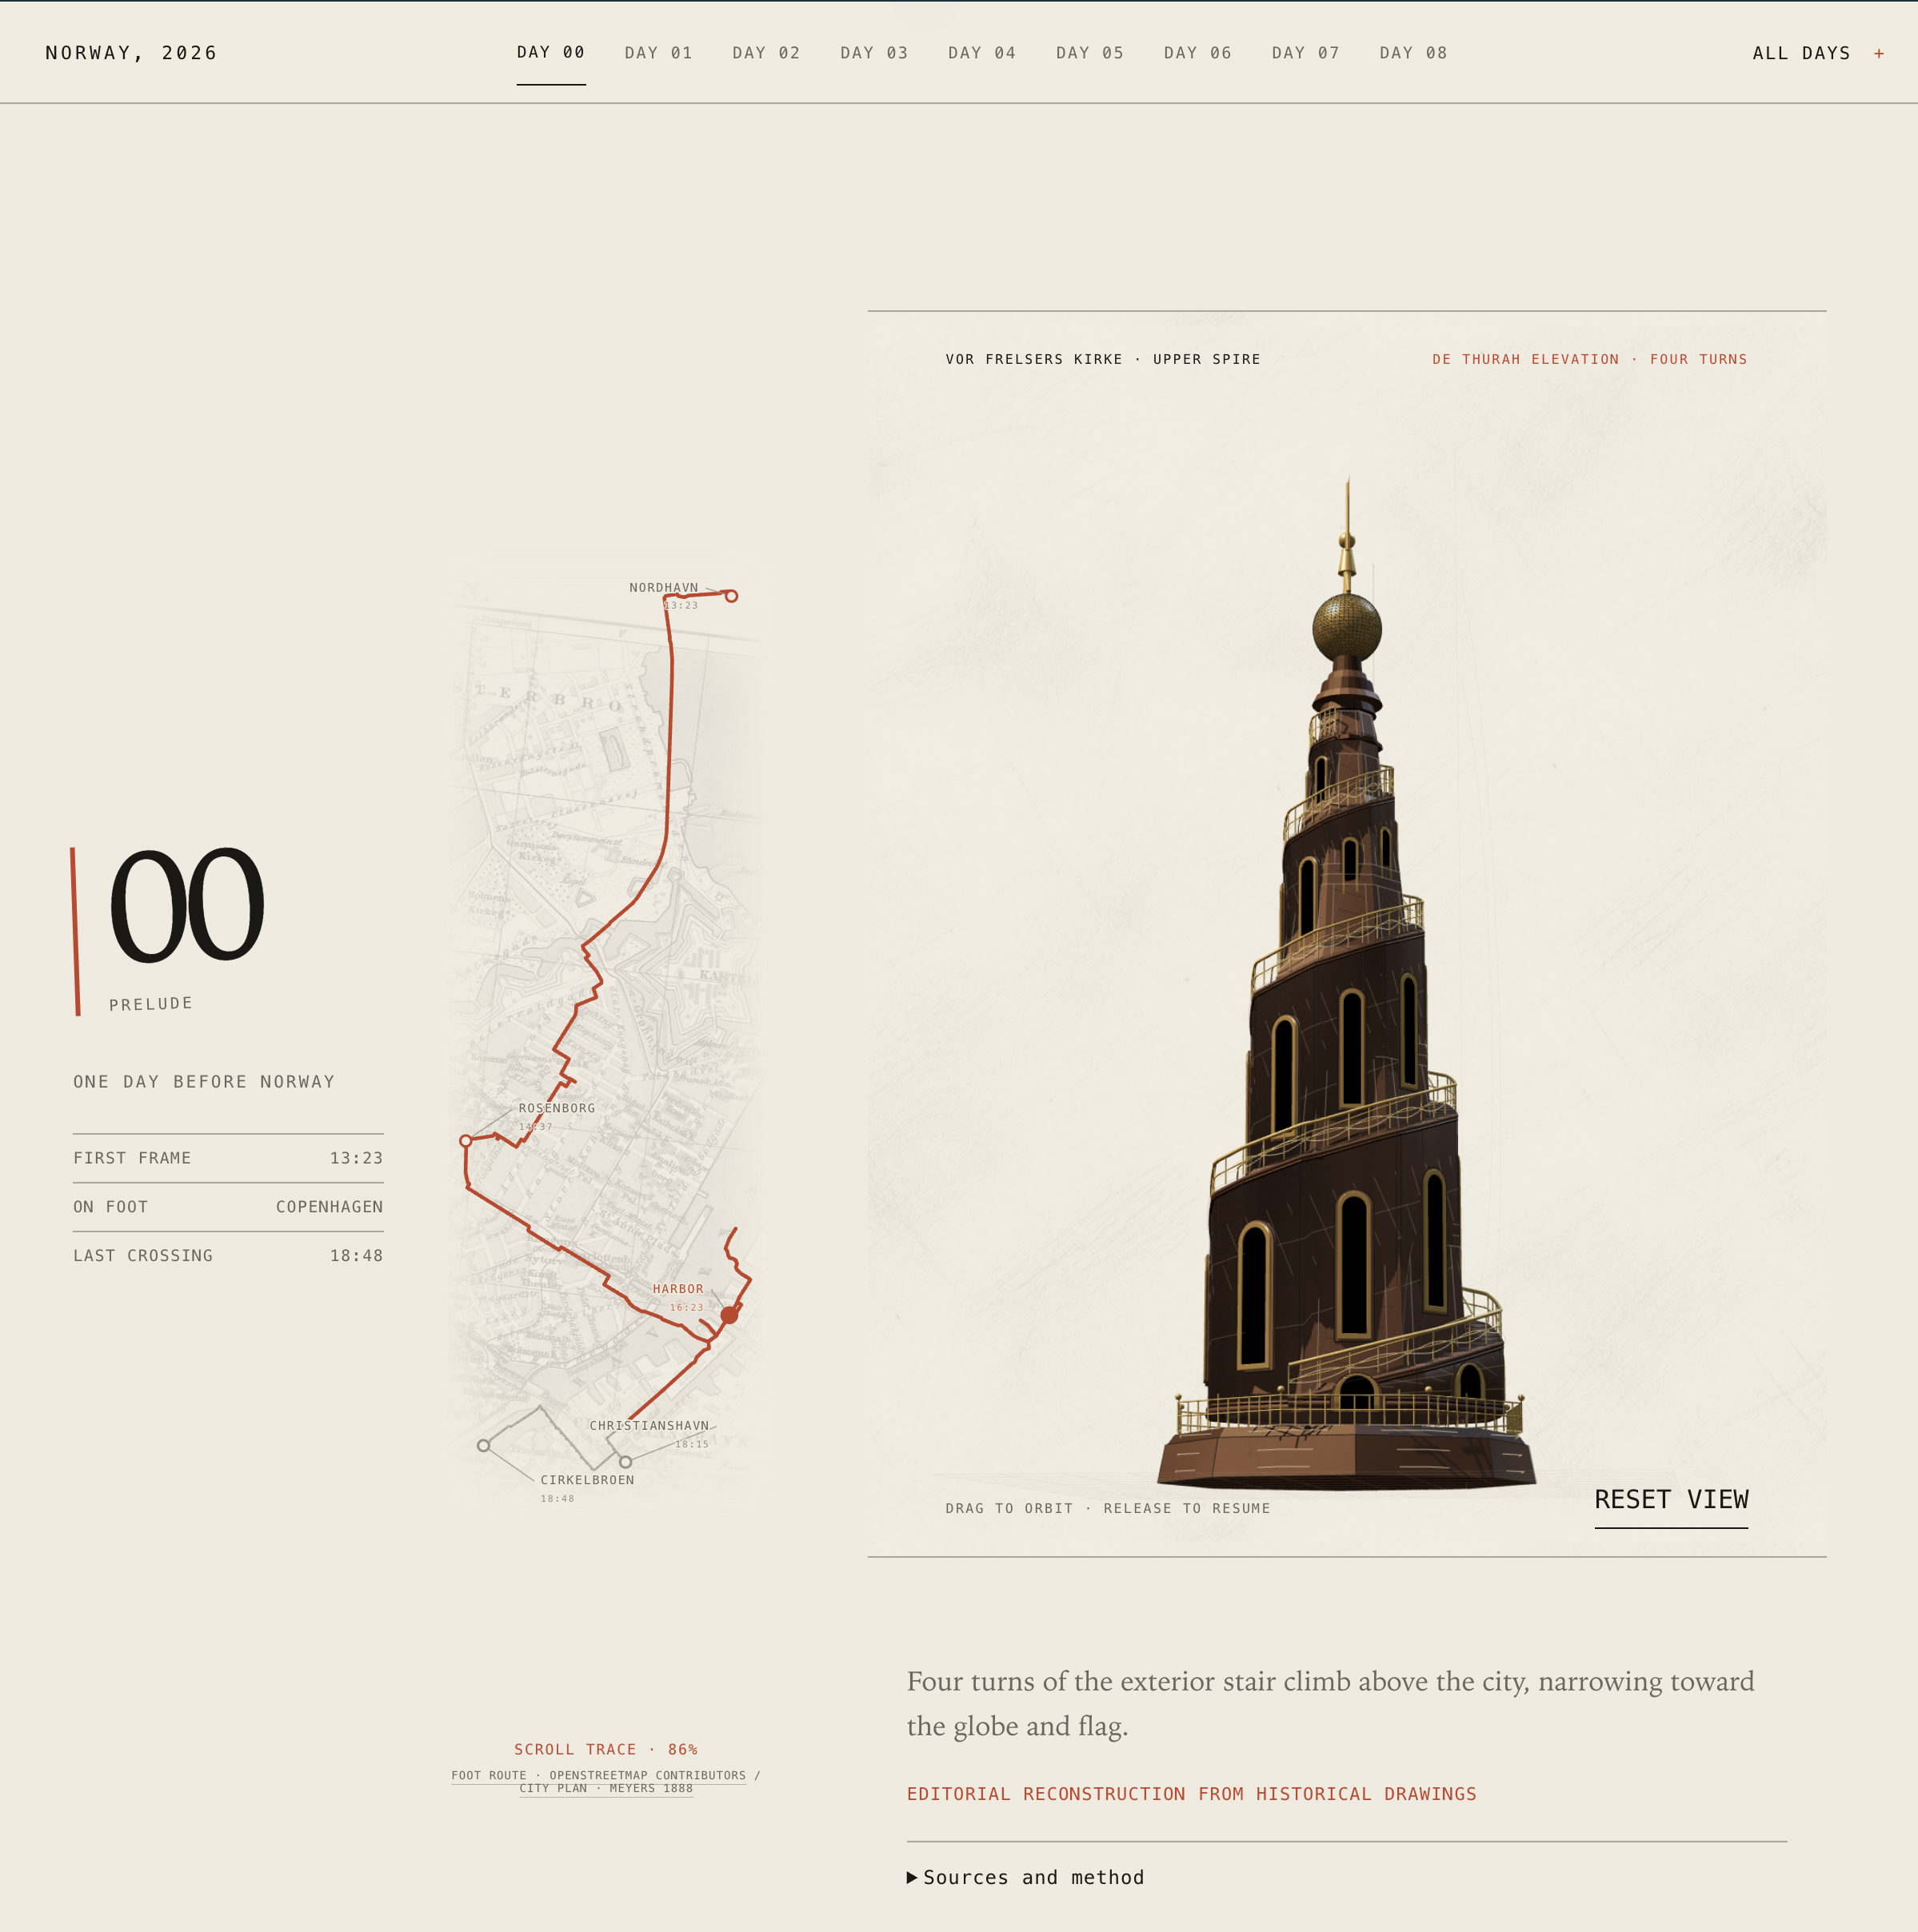
Only when GPT-6 Astra came out could I actually get a better 3D model. Astra was much better at 3D modeling. I could keep refining the tower and get it closer to the photographs and the drawing.
Visualizing the opening
For Cirkelbroen, I gave Codex a video showing the bridge from above. I wanted to see if we could make a drawing that moved as the bridge opened.
The selected overhead concept
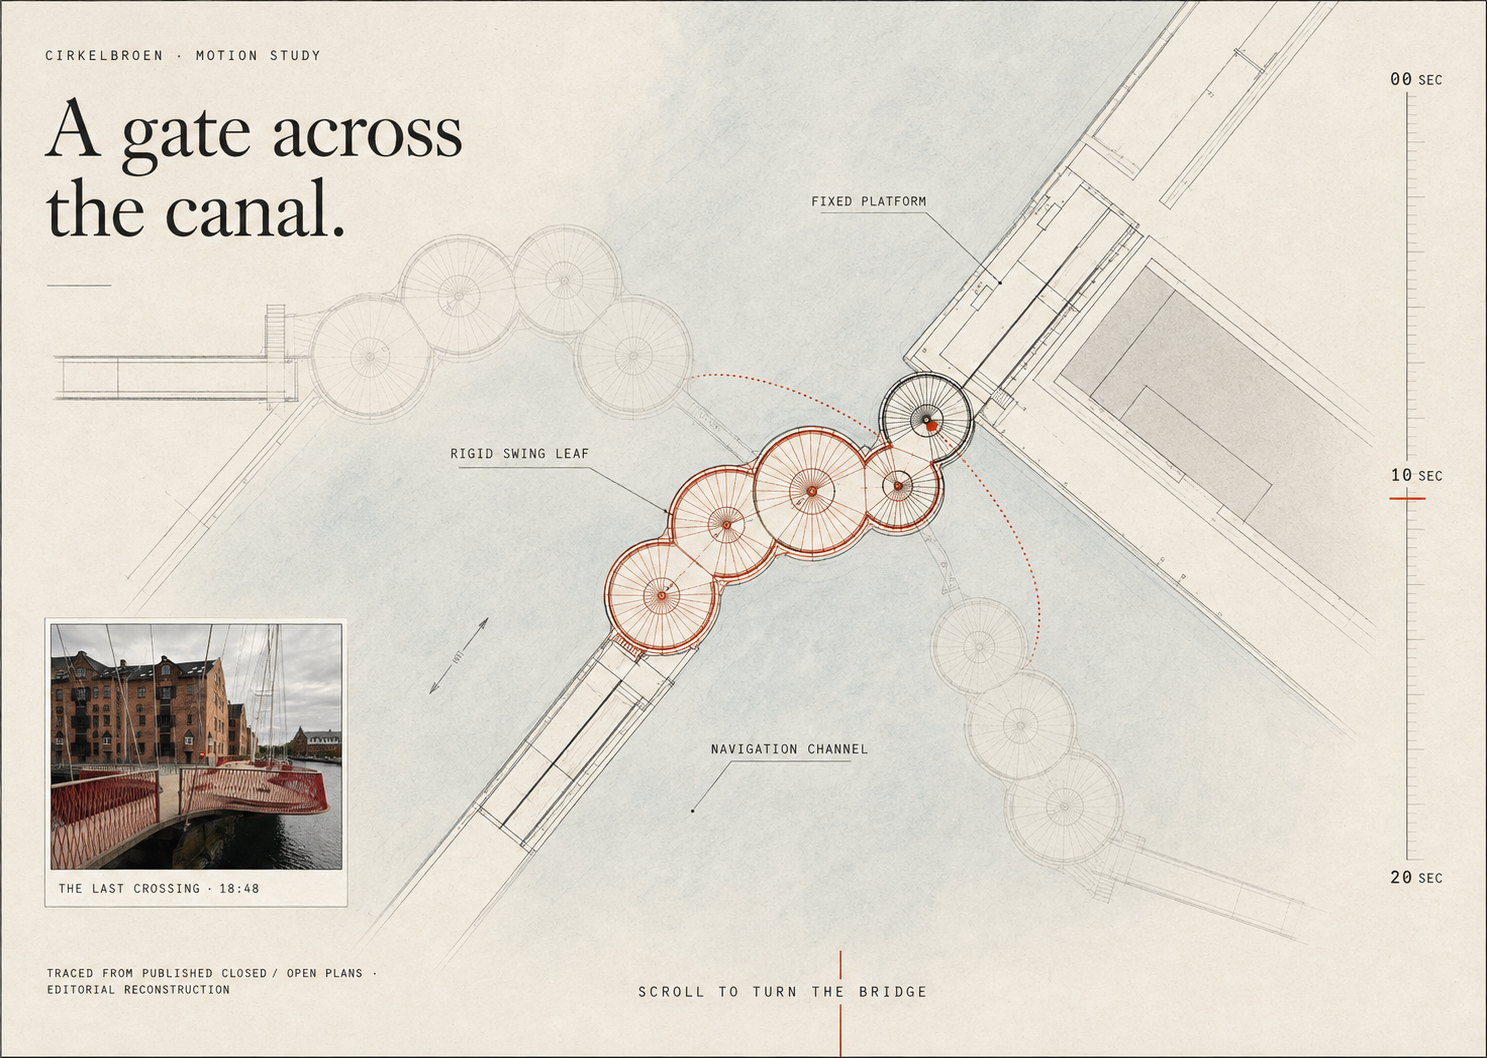
September 3. The overhead concept I chose. The moving platforms still needed correction. Image: GPT Image, directed with GPT‑5.6 Sol.
I liked this concept, but I wanted to check how the real bridge moved. I'd asked Codex to find architectural plans as well.
The closed and open engineering plans
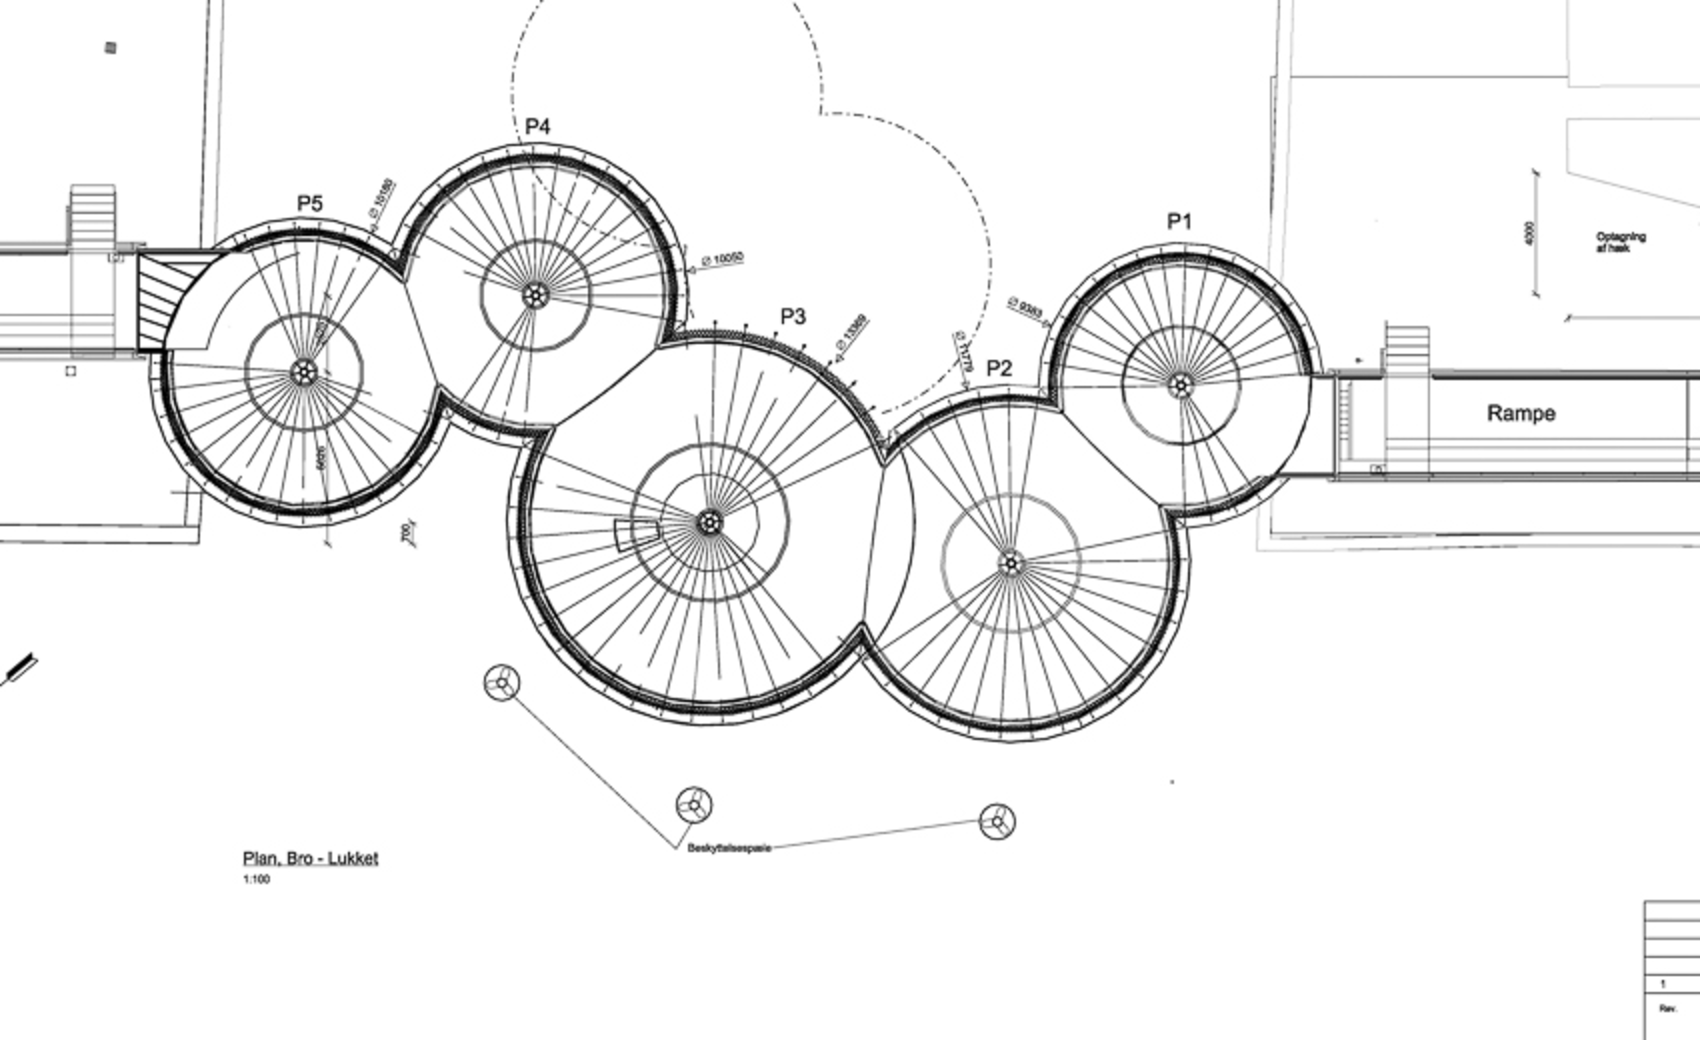
Cirkelbroen closed. Design: Studio Olafur Eliasson. Engineering: Ramboll. Source: EUmies Awards project archive. 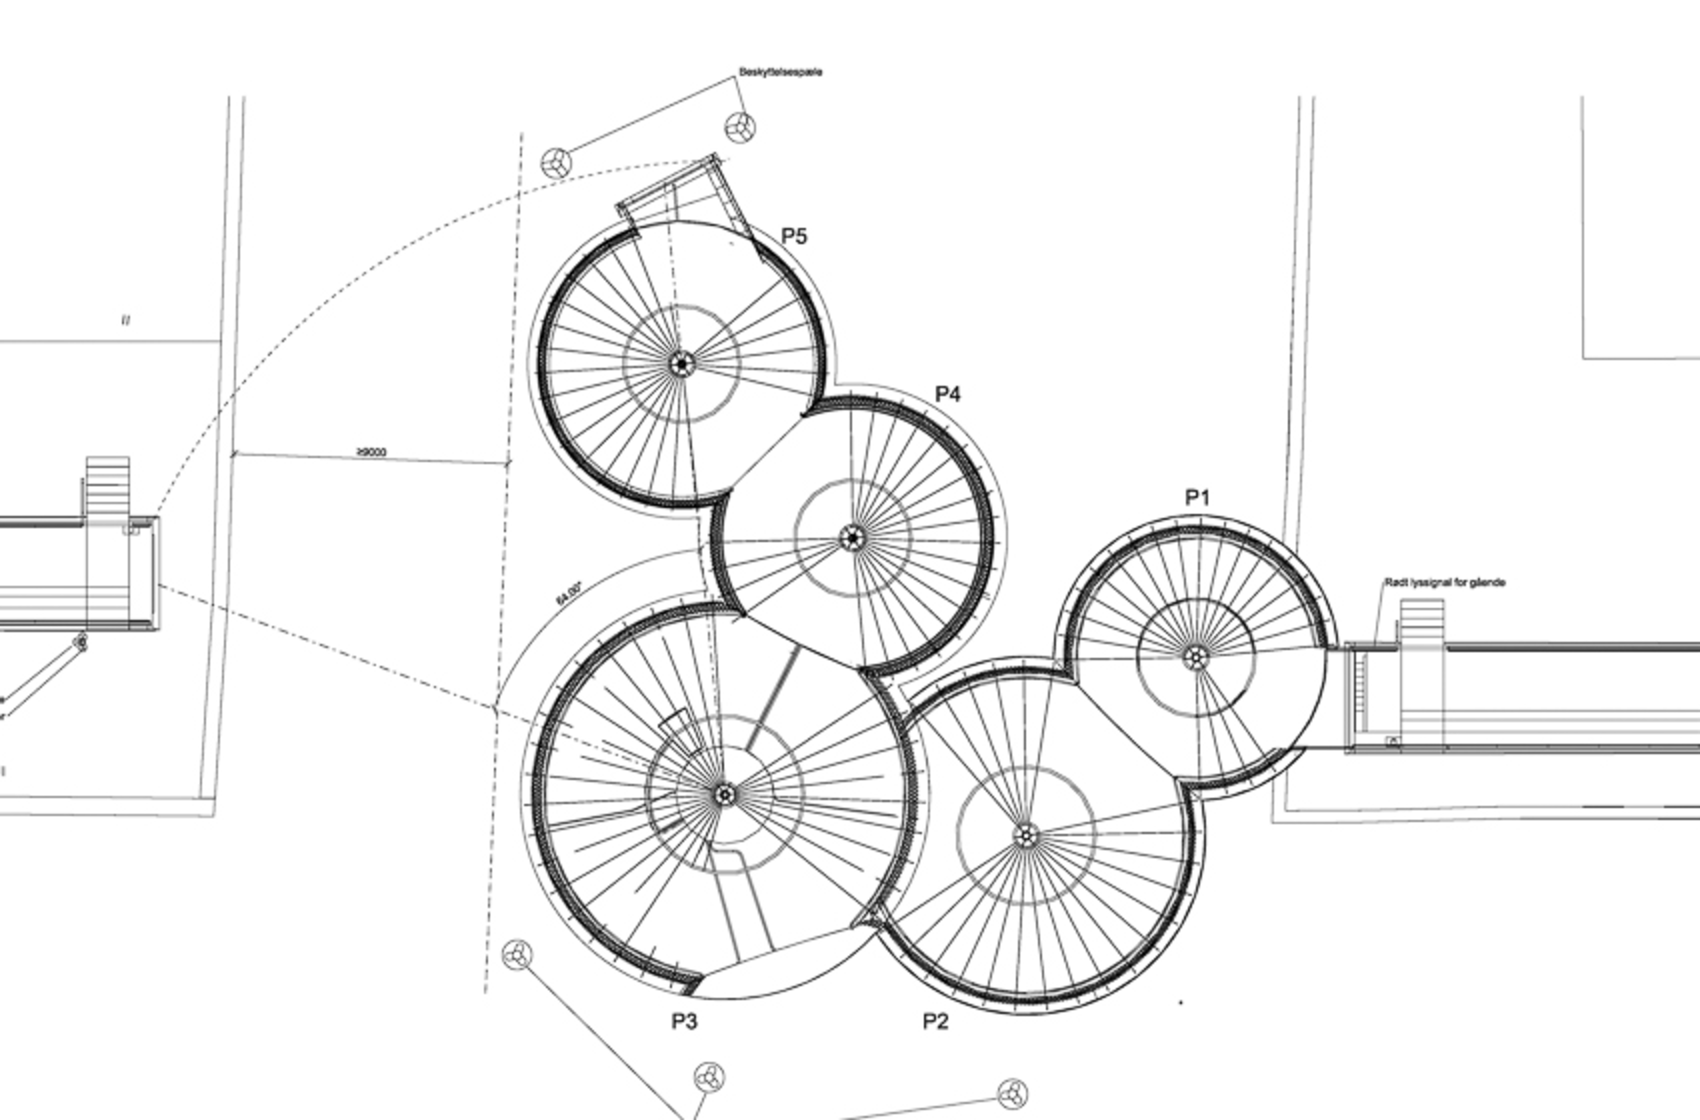
Cirkelbroen open. Two platforms stay fixed while three turn together. Same project and source.
The open and closed drawings showed that two platforms stay still while three turn together. The generated concept had that wrong. We used the plans and the video to correct it when building the animation.
Tidying up
While I was working through all these ideas, I kept refining and editing my photographs, updating them in the site, and working on the copy. I went back through the family passages to explain the connections and correct the details. I also asked Codex to use my Darkroom page as a reference for how I write.
The cover took a few iterations too. We tried generated backgrounds with space for photographs, and I ended up putting the final photographic cover together myself.
The background and my final cover
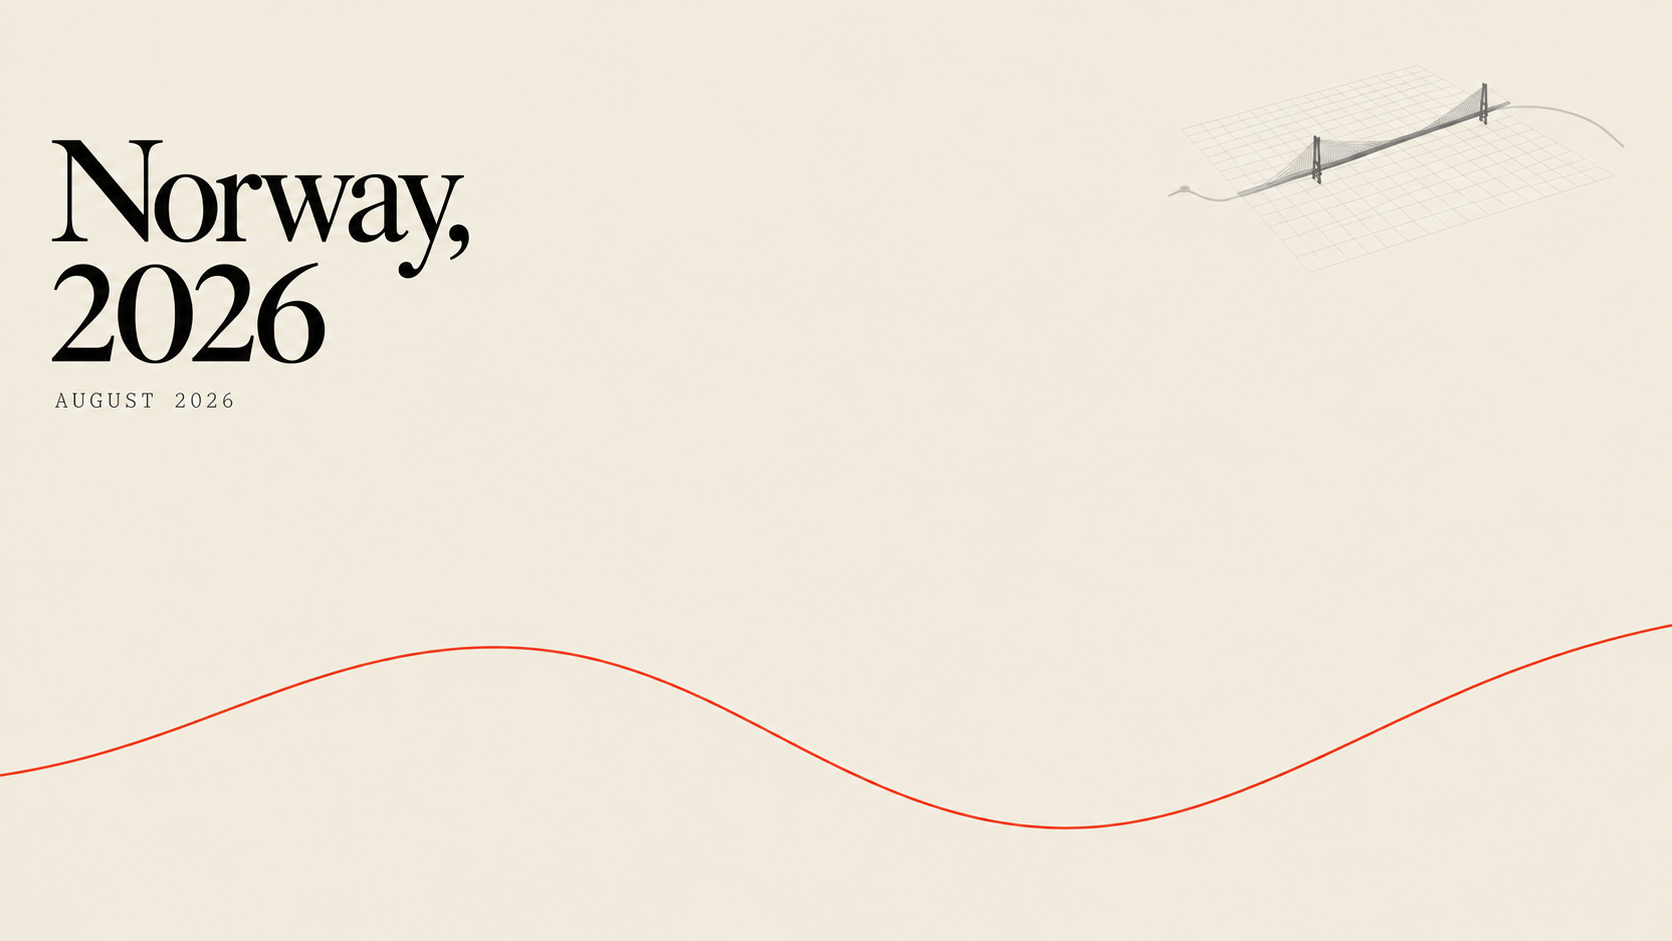
September 28. A generated background for composing the cover by hand. Image: GPT Image, directed with GPT‑6 Astra. 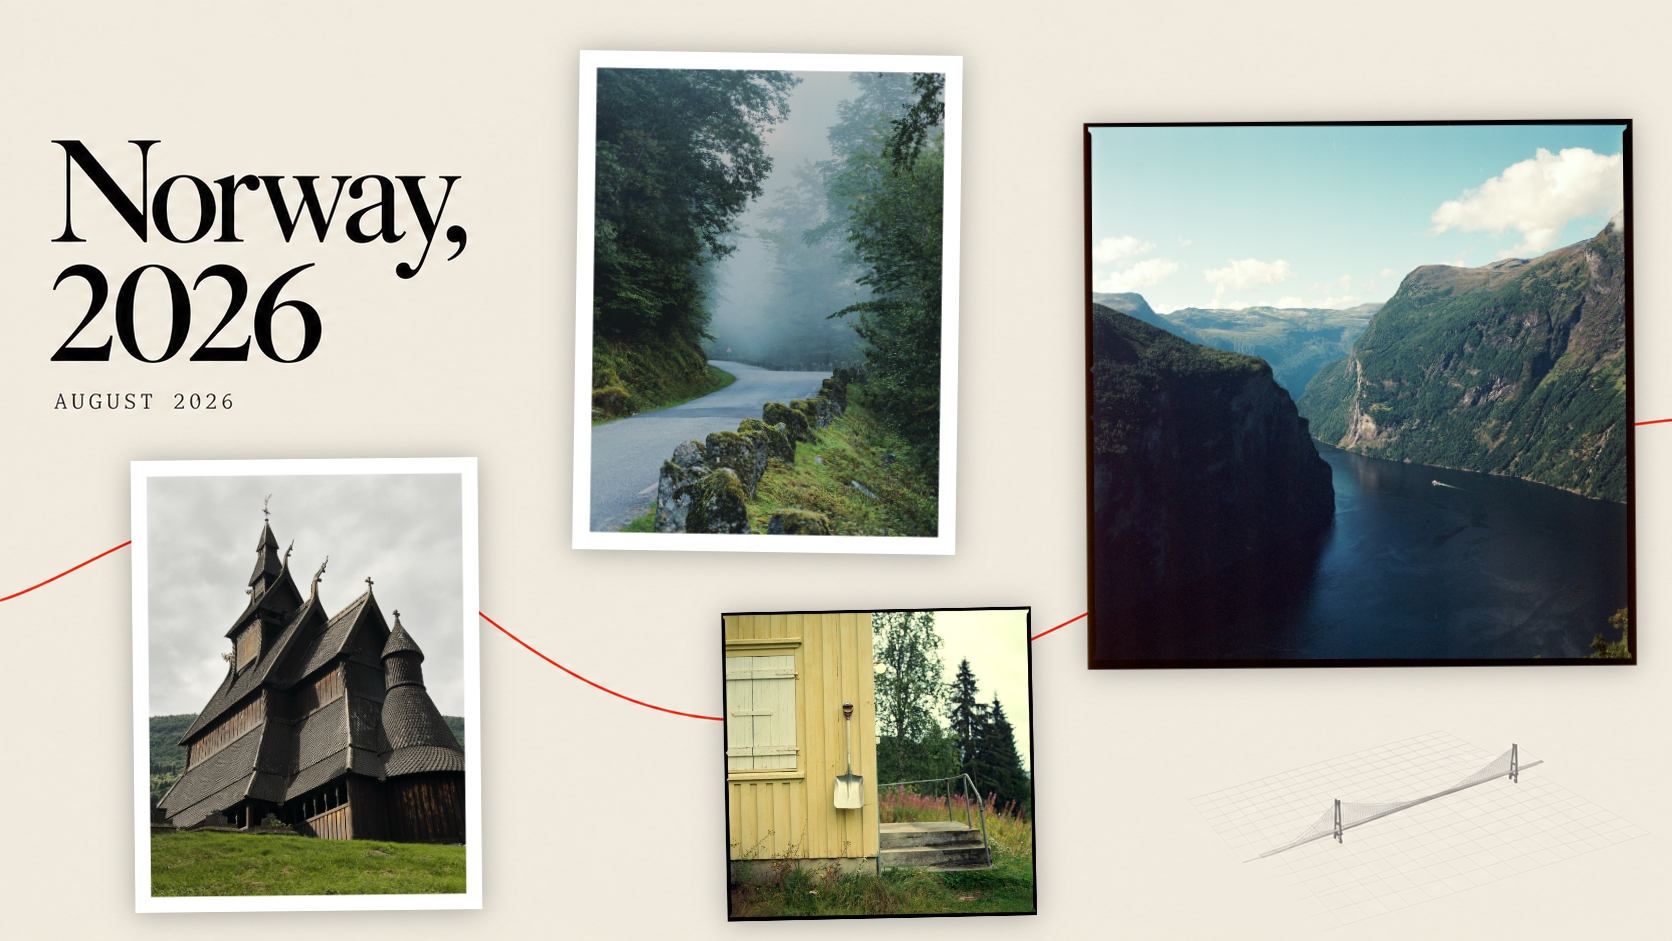
September 28. The photographic cover I composed.
The work in numbers
The prompts shown here are only a selection. Across 31 Codex chats, I sent 222 prompts and follow-ups while building the scrapbook.
| Purpose | Aug 31143 prompts | Sep 147 prompts | Sep 2141 prompts | Sep 2831 prompts |
|---|---|---|---|---|
| Refining and correcting85 · 38.3% | 58 | 3 | 15 | 9 |
| Project organization30 · 13.5% | 13 | 2 | 10 | 5 |
| Photos and context27 · 12.2% | 9 | 2 | 10 | 6 |
| Concepts and design27 · 12.2% | 19 | 0 | 1 | 7 |
| Building features20 · 9.0% | 19 | 0 | 1 | 0 |
| Research and references20 · 9.0% | 15 | 0 | 1 | 4 |
| Testing and review13 · 5.9% | 10 | 0 | 3 | 0 |
If you're curious what all those API tokens cost, here's the breakdown for building the scrapbook.
| Model | Processed tokens | API-equivalent cost |
|---|---|---|
| GPT‑5.6 Sol | 793.05 million | $442.91 |
| GPT‑6 Astra | 257.47 million | $378.52 |
| Total | 1.05 billion | $821.43 |
I have a ChatGPT Pro 20x account, so I don't pay per token. This is what it would cost if it was just making this at API prices.